Kitchen Renovation Planning and Budgeting Mistakes Australia 2026: Poor planning and inadequate budgeting are the leading causes of kitchen renovation failures, with 65% of projects exceeding initial budgets by $5,000-$15,000 due to underestimating costs, failing to include contingency funds, unrealistic timeline expectations, and hidden structural issues discovered during demolition. Comprehensive upfront planning including detailed scope definition, realistic budget allocation with contingencies, thorough contractor research, and allowance for decision-making time prevents the majority of costly mistakes that derail kitchen renovations and strain homeowner finances.

No Contingency Budget 15-20% Most Critical Error: The single most damaging planning mistake is failing to allocate contingency budget for unexpected costs that inevitably arise during kitchen renovations. Industry standard contingency is 15-20% of total project budget, meaning a $30,000 kitchen renovation should budget $34,500-$36,000 total including $4,500-$6,000 contingency reserve. Common unexpected costs requiring contingency funding: structural issues discovered during demolition including rotted joists requiring replacement $1,500-$4,000, outdated electrical requiring full rewire to meet current code $2,000-$5,000, asbestos discovery in pre-1990 homes requiring professional removal $2,000-$8,000, plumbing relocation more complex than anticipated $1,500-$3,500, substrate repair before new flooring installation $800-$2,500, and scope creep from upgrading fixtures/finishes mid-project $2,000-$8,000. Homeowners without adequate contingency face three bad options when unexpected costs arise: abandon renovation mid-project leaving kitchen unusable (rarely viable), choose cheaper inferior materials compromising quality and longevity, or incur high-interest credit card debt or emergency loans adding thousands in interest charges. Contingency usage statistics: 80% of kitchen renovations use at least some contingency funds, average contingency usage 60-70% of allocated amount (e.g., $3,000-$4,000 of $5,000 contingency), with remaining contingency often applied to wished-for upgrades at project end or returned to savings. Contingency fund management: keep separate from main renovation budget in dedicated savings account, document all contingency expenditures with receipts and reasons, require written change order approving contingency use before proceeding, and resist using contingency for discretionary upgrades early in project (save for genuine unexpected issues).

Underestimating Total Project Costs $5,000-$15,000 Shortfall: Homeowners consistently underestimate true total kitchen renovation costs by focusing only on visible elements (cabinets, benchtops, appliances) while ignoring essential but less glamorous expenses including demolition, waste disposal, structural repairs, electrical/plumbing updates, and finishing details. Realistic budget allocation for $30,000-$40,000 mid-range kitchen renovation: cabinets and installation 35% ($10,500-$14,000) for quality semi-custom cabinets with soft-close hardware and professional installation, benchtops 15% ($4,500-$6,000) for engineered stone or quality laminate with professional templating and installation, appliances 20% ($6,000-$8,000) for mid-range fridge/oven/cooktop/rangehood/dishwasher package, trades and labour 15% ($4,500-$6,000) for licensed plumber, electrician, tiler, carpenter work, sink/tapware 5% ($1,500-$2,000) for quality undermount sink and mixer tap, lighting 5% ($1,500-$2,000) for task/ambient/feature lighting including installation, flooring 5% ($1,500-$2,000) for tiles or quality vinyl with installation, and contingency/miscellaneous 15% ($4,500-$6,000) for unexpected costs and small items. Hidden costs often overlooked adding $5,000-$10,000 to budgets: waste removal and skip bins $800-$1,500 depending on renovation size and local council fees, temporary kitchen setup $300-$800 for microwave, kettle, and basic cooking facilities during renovation, eating out or takeaway during renovation $1,000-$2,500 for 4-8 week project timeline, council permits and certifications $500-$1,500 for electrical certificate of compliance and any required building permits, appliance delivery and installation $400-$800 separate from appliance purchase price, and professional design/drawings if using kitchen designer $1,500-$4,000 for detailed plans and 3D renderings. Budget management strategies: get itemized quotes breaking down all costs not just total price, compare 3-5 quotes from different suppliers and contractors ensuring like-for-like scope, lock in all material selections and decisions before work commences (changes mid-project add 20-30% premium), and track all expenditures against budget categories weekly to identify overruns early when corrective action possible.

Unrealistic Timeline Expectations Causing Stress and Rushed Decisions: Homeowners dramatically underestimate kitchen renovation timeframes expecting 2-3 week completion when reality is 6-12 weeks for full renovation, leading to stress, pressure on contractors, and poor rushed decisions compromising quality. Realistic kitchen renovation timeline for full renovation: planning and design phase 2-4 weeks for measuring, design, material selection, quote comparison, and contractor booking, demolition phase 2-4 days for removing old cabinets/benchtops/appliances and disposing waste, rough-in phase 1-2 weeks for structural repairs, electrical rough-in, plumbing rough-in, and any wall modifications, cabinet installation 3-5 days for assembling and installing base and wall cabinets with accurate leveling, benchtop templating and installation 1-2 weeks including 5-7 day wait for stone fabrication after templating, appliance and fixture installation 2-3 days for sink, tapware, cooktop, oven, rangehood, dishwasher connection by licensed trades, tiling and flooring 3-5 days for splashback, floor tiles, and grouting with cure time, and finishing touches 2-3 days for lighting installation, hardware fitting, touch-up painting, and final clean. Total realistic timeframe: 6-8 weeks for straightforward renovation keeping existing layout, 8-12 weeks for renovation with layout changes requiring extensive plumbing/electrical relocation, and 12-16+ weeks for full structural renovation removing walls or expanding kitchen footprint. Timeline delay factors: material supply delays especially for custom cabinets (3-6 weeks lead time), stone benchtops (2-4 weeks from order to installation), and imported tiles, tradie availability with licensed electricians and plumbers often booked 2-4 weeks ahead during busy periods, weather delays for external work or deliveries during rain periods, hidden issues discovered during demolition requiring additional time for repairs, and council permit approval delays adding 2-6 weeks if structural changes require approval. Homeowner timeline management: book contractors minimum 4-6 weeks ahead during peak renovation season (September-March), order long-lead items (cabinets, stone, custom features) immediately after finalizing design, arrange temporary accommodation or prepare for extended disruption (8-10 weeks safer than 6 weeks), and build 2-3 week buffer into timeline for inevitable delays rather than planning overseas holiday immediately after projected completion.

Scope Creep and Mid-Project Changes Adding 20-30% Costs: Changing decisions mid-project is extremely expensive mistake, with seemingly small changes like upgrading tapware ($300 to $800) or adding extra cabinet ($1,200 to $2,000 installed) or changing tile selection ($400 restocking plus $800 new tiles plus $500 extra labour) adding 20-30% to total project costs when multiple changes accumulate. Scope creep causes: insufficient planning time leading to rushed initial decisions later regretted, seeing nicer options during renovation triggering desire to upgrade, contractor suggestions of "while we're at it" additions that sound reasonable but add cost, and spouse disagreement on selections requiring mid-project compromise changes. Mid-project change cost premiums: material restocking fees 10-25% on returned items, labour inefficiency charges as tradies wait for new materials or redo completed work, project timeline delays adding rental accommodation costs if living elsewhere, lost trade discounts when ordering individual items vs package deals, and general contractor markup on changes typically 20-30% over original quote pricing. Most expensive common mid-project changes: cabinet style or color change after ordering $3,000-$8,000 restocking fee plus new cabinet wait time, benchtop material upgrade after template $500-$1,500 restocking plus 2-3 week delay for new fabrication, tile selection change mid-installation $800-$2,000 for restocking and new materials plus tradie time, appliance upgrades after cabinetry installed may require cabinet modifications $500-$1,500, and layout changes after demolition requiring new electrical/plumbing rough-in $2,000-$6,000. Scope creep prevention: spend adequate time (3-4 weeks minimum) finalizing all material selections before signing contracts, create physical or digital mood board with all finishes together to ensure cohesion, obtain spouse/partner sign-off on every selection before ordering, and institute "no changes" rule once work commences with narrow exceptions only for genuine defects or safety issues.

Kitchen Design and Layout Mistakes Australia 2026: Poor kitchen design and layout errors create daily frustration and reduce home value, with common mistakes including inadequate work triangle planning (distances over 9 metres reducing efficiency), insufficient storage planning (30% shortfall from needs), poor lighting design (under 300 lux at work surfaces), and inadequate ventilation (rangehood under 900mm or under-powered CFM). Design mistakes are often irreversible without major renovation, making upfront planning with professional kitchen designer ($1,500-$4,000) valuable investment preventing $10,000-$25,000 in remediation costs or permanent inconvenience.

Poor Work Triangle Layout Reducing Kitchen Efficiency: The kitchen work triangle connecting sink, cooktop, and refrigerator is fundamental design principle for efficient workflow, with optimal total distance 4-7 metres and each leg 1.2-2.7 metres. Common work triangle mistakes: total distance over 9 metres creating excessive walking between key work areas (common in large poorly-planned kitchens), individual leg distances under 1.2 metres creating cramped work zones with insufficient bench space, major traffic paths cutting through triangle forcing cooks to dodge family members walking through, and island placement blocking direct routes between sink and cooktop adding detours. Work triangle planning principles: measure existing kitchen workflow documenting inefficiencies to avoid repeating them, position sink first as it's most plumbing-intensive and costly to relocate ($2,000-$4,000 for major moves), place cooktop with adequate ventilation near external wall if possible, and locate refrigerator near kitchen entry for family access without entering main work zone. Work triangle alternatives for non-traditional layouts: work zones approach groups related tasks (prep zone, cooking zone, cleaning zone) with dedicated bench space 1-1.5 metres per zone, galley kitchens use parallel zones with 1.2-1.5 metre clearance between benches, L-shaped and U-shaped kitchens naturally create efficient triangles if designed with 1.2-2.7 metre spacing, and open-plan kitchens with islands create dual work zones for multiple cooks. Fixing poor work triangle post-renovation extremely expensive: moving sink requires plumber ($2,000-$4,000), new cabinetry and benchtop at old and new locations, and potential flooring repair, while moving cooktop requires electrician ($800-$1,500) or gas fitter ($1,000-$2,000), new benchtop cutout, rangehood relocation, and potential splashback changes. Total work triangle correction costs $8,000-$20,000 making initial correct design critical.

Insufficient Storage Planning 30% Shortfall From Actual Needs: Underestimating storage requirements by 20-30% is pervasive mistake leaving homeowners with cluttered benchtops, overstuffed cabinets, and appliances stored in garage or laundry. Minimum storage requirements for functional kitchen: 8-10 linear metres of base cabinets for average 3-4 person household, 4-6 deep drawers (minimum 400mm deep) for pots, pans, and large items, 2-3 pull-out pantries (minimum 400mm wide) for dry goods storage, dedicated appliance storage for mixer, food processor, blender, toaster, kettle (either appliance garage or dedicated cabinet), corner solutions (carousel, magic corner, or LeMans) maximizing often-wasted corner space, overhead cabinets to ceiling (2.4-2.7 metres) not stopping at 2.1 metres leaving dusty unusable gap, and bins/recycling with minimum 3-bin system (waste, recycling, organics) requiring 600mm cabinet width. Storage planning methodology: inventory all kitchen items before design including cookware (pots, pans, baking trays), servingware (bowls, platters, serving utensils), dry goods (typical household stores 40-80kg dry goods), small appliances (average household owns 8-12 small appliances), and utensils/gadgets, then add 20-30% growth allowance for future acquisitions over 5-10 year timeframe. Storage mistake consequences: cluttered benchtops reducing usable work surface from intended 3-4 metres to actual 1.5-2 metres, overflow storage in laundry, garage, or pantry requiring trips during cooking, and expensive post-renovation storage additions including freestanding pantries ($800-$2,000), overhead pot racks ($300-$800), or wall-mounted storage systems ($400-$1,200). Storage maximization strategies: use full-height cabinets 2.4-2.7 metres utilizing vertical space, specify deep drawers with quality soft-close runners instead of base cabinets with shelves (drawers provide 30-40% better access and storage density), include pull-out mechanisms for pantry and under-sink cabinets improving access to back areas, and design island with storage both sides if space permits doubling storage utility.

Inadequate Lighting Design Under 300 Lux at Work Surfaces: Poor kitchen lighting is one of most common yet easily avoidable mistakes, with many renovations relying solely on overhead downlights providing insufficient task lighting (150-200 lux) where 300-500 lux needed for safe food preparation. Kitchen lighting layers required: task lighting providing 300-500 lux at all work surfaces using LED strip lights under wall cabinets over benchtops, pendant lights over islands/breakfast bars, and directional spotlights over cooktop areas, ambient lighting providing 150-200 lux general illumination using recessed downlights on 1-1.5 metre spacing or flush-mount ceiling fixtures, accent lighting highlighting features using in-cabinet lighting for glass-front cabinets, under-cabinet toe-kick lighting, or island waterfall edge lighting, and natural lighting maximizing windows and skylights where possible with task lighting filling gaps during evening/winter. Task lighting installation costs: LED strip lights under cabinets $40-$80 per metre including LED tape, aluminum channel, power supply, and installation totaling $400-$800 for typical kitchen with 5-8 metres of wall cabinets, pendant lights over island $200-$600 each for quality fixtures with 2-3 pendants typical ($600-$1,800 total), recessed downlights $80-$150 each installed including LED lamp, housing, and electrical connection with 8-12 downlights typical ($800-$1,800 total), and dimmer switches $80-$150 each for separately controlling task/ambient/accent layers. Lighting control strategies: separate switches for task lighting (used daily during cooking), ambient lighting (used when kitchen occupied), and accent lighting (used for entertaining or aesthetic effect), dimmer controls allowing adjustment from bright task lighting (100% for cooking) to soft ambient lighting (20-30% for entertaining), and smart lighting integration with voice or app control increasingly popular ($200-$500 premium over standard switches). Inadequate lighting consequences: eye strain and headaches from insufficient light during food preparation, safety hazards including knife accidents from poor visibility, and shadows cast by cook blocking overhead light at benchtop requiring supplemental task lighting anyway. Retrofitting proper lighting after renovation expensive: running new electrical wiring in finished kitchen $800-$2,000, making holes in new splashback for under-cabinet lights $300-$800 for tiler to drill and patch, and disruption to completed kitchen requiring protective covering. Comprehensive lighting budget $2,000-$4,000 for complete 3-4 metre x 3-4 metre kitchen essential not optional.

Inadequate Ventilation and Rangehood Specification: Undersized or under-powered rangehood is common mistake creating lingering cooking odors, grease accumulation on cabinets, and moisture problems. Rangehood sizing requirements: minimum 900mm width for cooktops 600-900mm wide (equal to or wider than cooktop), 1200mm rangehood width for 900mm+ cooktops or commercial-style ranges, and canopy style extending 150mm beyond cooktop each side for optimal capture. Rangehood power requirements measured in cubic metres per hour (m³/hr) airflow: minimum 850-1000 m³/hr for standard residential cooktop with 4-5 burners, 1200-1500 m³/hr for high-output cooktop or wok burner, calculate minimum CFM rating as room volume × 10-15 air changes per hour (e.g., 4m × 3m × 2.4m ceiling = 28.8m³ × 12 air changes = 345 m³/hr minimum), and increase CFM by 50-100% if ducting long distance (over 3 metres) or includes multiple bends reducing efficiency. Rangehood ducting requirements: external ducting to outside preferred over recirculating models (external removes steam, odors, and grease rather than just filtering), 150mm diameter ducting minimum with 200mm diameter for high-CFM units, minimize ducting length and bends (each 90° bend reduces efficiency 10-15%), and use smooth rigid ducting not flexible ducting where possible (flex ducting reduces airflow 20-30%). Common rangehood mistakes: choosing decorative rangehood based on appearance rather than performance specifications, undersized 600mm rangehood over 900mm cooktop leaving edges without coverage, recirculating rangehood in location where external ducting possible (recirculating only captures 50-60% effectiveness), and insufficient height clearance between cooktop and rangehood (minimum 650mm for gas, 450mm for electric). Rangehood costs: quality 900mm canopy rangehood 850-1000 m³/hr $600-$1,200, premium 1200mm rangehood 1200+ m³/hr $1,200-$2,500, external ducting installation $400-$1,200 depending on roof penetration complexity and run length, and upgrading rangehood post-renovation $1,000-$2,000 including removal of undersized unit, purchasing correct unit, and installation. Proper rangehood specification during planning prevents ongoing frustration and expensive upgrades.

Kitchen Material Selection Mistakes Australia 2026: Choosing inappropriate materials for kitchen conditions or selecting low-quality products to save money are costly mistakes resulting in premature failure requiring replacement within 5-10 years instead of expected 15-25 year lifespan. Common material mistakes include cheap benchtops deteriorating within 5 years ($4,000-$8,000 replacement), wrong flooring selection showing wear or water damage ($3,000-$6,000 replacement), low-quality cabinet hardware failing ($2,000-$4,000 cabinet door/drawer replacement), and inadequate splashback materials staining or cracking ($1,500-$3,000 replacement). Material selection requires balancing durability, maintenance requirements, aesthetic appeal, and budget across all kitchen elements.

Cheap Benchtop Selection Failing Within 5 Years $4,000-$8,000 Replacement: Kitchen benchtop is highest-use surface enduring heat, moisture, knife marks, and cleaning chemicals daily, requiring durable material selection not cheapest option. Benchtop material comparison: engineered stone (Caesarstone, Quantum Quartz, Essastone) $600-$1,000 per m² is optimal choice for most kitchens offering heat resistance to 280°C, scratch resistance requiring moderate effort to mark, stain resistance to most foods/liquids, 15-25 year lifespan with minimal maintenance, and comprehensive warranty 10-15 years, laminate benchtops $200-$400 per m² suit budget renovations but chip easily at edges, burn from hot pots leaving permanent marks, and show wear within 5-8 years requiring replacement, natural stone granite $500-$900 per m² offers durability and heat resistance but requires annual sealing and can stain from acidic foods/liquids, while marble $600-$1,200 per m² looks luxurious but stains very easily from lemon juice, wine, and tomato sauce making it impractical for main benchtop (suitable only for dedicated baking area), and solid surface (Corian) $400-$700 per m² offers seamless joins and repairability but scratches more easily than stone. Benchtop thickness options: 20mm standard thickness suits most applications and budgets, 40mm thick benchtops for island overhangs or waterfall edges cost 80-100% more than 20mm but provide dramatic appearance and structural strength for cantilevers, and mitred edge profiles simulating 40mm thickness from 20mm material save 30-40% while achieving similar aesthetic. Typical benchtop area: 4m × 600mm perimeter benchtop plus 2.4m × 900mm island equals approximately 5 square metres requiring budget $3,000-$5,000 for engineered stone installed. Cheap benchtop consequences: chips at sink cutout edges from impact within 1-2 years requiring repair or living with damage, burns and marks from hot pots creating permanent white marks on laminate, staining from turmeric, beetroot, wine creating permanent discoloration on unsealed stone or laminate, and delamination at joins or edges from moisture penetration requiring sections replacement $800-$1,500. Benchtop replacement costs if installed incorrectly first time: full replacement $4,000-$8,000 including removal of failed benchtop, disposal, new stone fabrication and installation, and reinstallation of sink/cooktop cutouts. Quality benchtop selection upfront prevents this expensive rework.

Wrong Flooring Material Selection for Kitchen Conditions: Kitchen flooring endures water splashes, dropped utensils, heavy traffic, and cleaning chemicals requiring durable water-resistant material, yet many homeowners select inappropriate materials showing wear or water damage within 3-5 years. Kitchen flooring material comparison: porcelain tiles 600×600mm or 600×300mm $40-$100 per m² are optimal choice offering water resistance, scratch resistance, easy cleaning, 20-30 year lifespan, and grout selection in waterproof epoxy grout ($15-$25 per m² premium over standard grout) preventing water penetration, luxury vinyl plank (LVP) $40-$80 per m² offers water resistance, scratch resistance, softer underfoot than tile, 15-20 year lifespan, and easier DIY installation than tiles, timber flooring $80-$150 per m² is unsuitable for kitchens due to water damage from splashes requiring refinishing every 5-8 years ($35-$50 per m²) or earlier replacement, laminate flooring $30-$60 per m² swells and delaminates from water damage especially at joins requiring plank replacement ($15-$25 per plank plus labour), and engineered timber $70-$120 per m² performs better than solid timber but still susceptible to water damage at island and sink areas. Flooring performance factors: water resistance is critical with porcelain and LVP performing best, slip resistance when wet requiring textured or matte finish tiles not polished porcelain (which becomes dangerously slippery when wet), hardness affecting dropped dish breakage with tiles causing more breakage than vinyl, noise transmission with tiles creating louder footfalls than vinyl, and thermal properties with tiles feeling cold underfoot in winter (underfloor heating $80-$150 per m² addresses this). Typical kitchen flooring area: 4m × 3.5m = 14 square metres requiring budget $1,400-$2,100 for mid-range tiles installed or $800-$1,400 for LVP installed. Wrong flooring consequences: water-damaged timber requiring sanding and refinishing $500-$1,500 or complete replacement $2,500-$5,000, swollen laminate planks at sink area requiring affected plank replacement ($300-$800) or complete floor replacement if damage extensive, and cracked tiles from structural movement if substrate preparation inadequate requiring tile replacement ($20-$40 per tile plus $100-$200 labour minimum callout). Flooring replacement costs after initial installation: removal of failed flooring $15-$25 per m², substrate repair $25-$40 per m², new flooring material and installation $55-$150 per m², totaling $1,400-$3,000 for 14m² kitchen floor. Selecting proven kitchen-appropriate flooring material initially prevents this expensive rework.

Low-Quality Cabinet Hardware and Fittings Failing Prematurely: Cabinet hinges, drawer runners, and door handles endure thousands of open/close cycles annually, with low-quality hardware failing within 2-5 years requiring expensive cabinet replacement or retrofit. Cabinet hardware quality tiers: premium Blum/Hettich soft-close hinges and drawer runners $40-$80 per cabinet/drawer providing 100,000+ cycle lifespan (20+ years), mid-range hardware $20-$40 per unit with 50,000 cycle lifespan (10-15 years), and budget hardware $8-$15 per unit lasting only 20,000-30,000 cycles (3-5 years) before soft-close mechanisms fail or runners bind. Cabinet hardware failure symptoms: soft-close mechanism failure causing doors to slam closed, drawer runners binding or derailing requiring wiggling drawer to close, hinges loosening causing doors to sag or fail to close properly, and handle screws stripping requiring replacement handles or filler plates. Hardware upgrade costs: retrofitting quality soft-close drawer runners to existing drawers $80-$150 per drawer including removal of old runners and installation of new, replacing failed hinges $40-$80 per cabinet door including hinge and installation, and total hardware replacement on 15-cabinet kitchen $2,000-$4,000 if all hardware requires upgrade. Cabinet quality indicators beyond hardware: 18mm thick cabinet boxes not 12-15mm (thicker provides better screw holding and structural rigidity), plywood or quality particle board construction not cheap MDF (which swells from moisture), adjustable legs allowing perfect leveling not fixed plinths, and quality joinery with dowels or biscuits not just glue and staples. Cabinet construction quality comparison: flat-pack budget cabinets $200-$400 per linear metre use thin materials and basic hardware lasting 8-12 years, semi-custom mid-range cabinets $500-$800 per linear metre use quality materials and hardware lasting 15-20 years, and custom cabinetry $900-$1,500+ per linear metre provides premium materials and hardware lasting 25+ years. False economy calculation: budget cabinets $200/m × 8m = $1,600 requiring replacement after 10 years total $3,200 over 20 years plus installation costs twice, versus quality cabinets $600/m × 8m = $4,800 lasting full 20+ years. Spending extra $3,200 upfront saves replacement costs and disruption.

Inadequate or Inappropriate Splashback Material Selection: Kitchen splashback protects walls from water, grease, and food splashes while providing key visual element, yet many homeowners choose materials that stain, crack, or prove impossible to clean effectively. Splashback material comparison: ceramic or porcelain tiles 100×100mm to 600×300mm $40-$100 per m² installed offer durability, easy cleaning, heat resistance, and almost unlimited design options with virtually permanent lifespan 20-30+ years, glass splashbacks 6mm toughened $250-$400 per m² installed provide seamless easy-clean surface, modern appearance, and custom colors but show water marks requiring frequent wiping and can crack from impact, acrylic splashbacks $150-$250 per m² offer budget alternative to glass but scratch more easily and discolor from heat near cooktop, stainless steel $200-$350 per m² provides commercial-kitchen aesthetic and exceptional durability but shows fingerprints and water marks requiring constant cleaning, and painted surfaces or wallpaper are completely inappropriate for kitchen splashbacks staining and marking within months requiring expensive replacement. Splashback installation requirements: minimum 600mm height behind cooktop for adequate protection with 900mm height preferred, extend splashback to full height between benchtop and wall cabinets (typically 450-600mm) not stopping 300mm above benchtop leaving gap prone to grease accumulation, and continue splashback at least 150mm beyond edges of cooktop for side protection. Tile splashback grout considerations: epoxy grout $15-25 per m² premium over standard grout is essential for kitchen splashbacks providing stain resistance and water resistance preventing discoloration and mould growth, grout lines should be minimal (2-3mm) for easier cleaning than wide grout lines (5-10mm), and regular grout sealing annually if standard cement grout used instead of epoxy. Splashback area calculation: typical 600mm high × 4m long main splashback plus 900mm high × 1.2m wide cooktop splashback equals approximately 3.5 square metres requiring budget $700-$1,500 for mid-range tiles installed. Inappropriate splashback consequences: painted drywall splashback staining from grease within 6-12 months requiring repainting ($400-$800) or tile installation over painted surface adding substrate preparation costs, cracked glass splashback from hot pot contact requiring full panel replacement $600-$1,200, and stained grout on porous natural stone tiles requiring professional cleaning ($200-$400) or regrouting ($400-$800). Quality splashback material selection and professional installation prevents these remediation costs.

Contractor Selection and DIY Mistakes Australia 2026: Hiring unqualified contractors or attempting complex DIY work are among costliest renovation mistakes, resulting in illegal work requiring complete rework ($10,000-$30,000), safety hazards, insurance claim denials, and difficulty selling property. Common contractor mistakes include failing to verify licences (electrician, plumber, builder all legally required), choosing cheapest quote 30-50% below market average (indicating cutting corners or hidden costs), skipping contract formalization leaving no legal protection, and no reference checking allowing poor performers to continue operating. DIY mistakes include attempting licensed trades illegally (plumbing, electrical, gas work) risking fines $5,000-$50,000 plus mandatory rework, structural changes without engineering assessment, and underestimating complexity resulting in abandoned half-finished projects.

No Licence Verification Before Hiring Contractors: Hiring unlicensed contractors for electrical, plumbing, or building work is illegal in all Australian states and territories, exposing homeowners to fines, mandatory rework at homeowner expense, insurance claim denials, and property sale complications. Required contractor licences by trade: electricians must hold electrical contractor licence verified on state regulator website (NSW Fair Trading, VIC Energy Safe, QLD QBCC) with licence number displayed on quotes and vehicles, plumbers must hold plumbing contractor licence covering general plumbing, gasfitting, or draining work as required, builders/carpenters undertaking structural work must hold builder's licence with class appropriate to project value (generally Class C for projects under $20,000, Class B for $20,000-$200,000 in most states), and tilers, painters, cabinet makers performing non-structural work typically don't require specific licences but should carry public liability insurance minimum $10 million. Licence verification process taking 5-10 minutes per contractor: request licence number from contractor (legitimate professionals provide immediately), verify on state government website using licence number to confirm current validity and any disciplinary history, check licence class/category covers scope of work (e.g., electrical contractor licence includes installation of kitchen appliances and lighting), verify business name matches licence holder (ensuring person you're dealing with is actual licensed person not employee or subcontractor), and request insurance certificates for public liability and workers compensation if employing staff. Unlicensed contractor consequences: illegal electrical work discovered during property sale requires licensed electrician inspection and Certificate of Compliance costing $500-$1,500, insurance claims denied if damage caused by unlicensed work (e.g., electrical fire, water damage from faulty plumbing) leaving homeowner fully liable potentially $50,000-$500,000, fines for homeowner $5,000-$10,000 in some states for knowingly engaging unlicensed contractor, and mandatory rework requirement forcing removal of illegal work and reinstallation by licensed contractor at homeowner expense $10,000-$30,000 typical for full kitchen. Licence checking investment: 30-45 minutes total to verify 3-4 contractors prevents potential $20,000-$100,000+ exposure from unlicensed work consequences.

Choosing Cheapest Quote 30%+ Below Market Average: Quotes significantly cheaper than competitors (30%+ below) are major red flag indicating insufficient insurance, unlicensed workers, corner-cutting on materials/quality, hidden costs emerging mid-project, or business financial distress risking project abandonment. Quote comparison methodology for 3-5 quotes: mid-range quotes (2nd and 3rd cheapest) from licensed insured contractors represent market rate and offer best value, highest quote often includes premium materials or conservative contingencies potentially negotiable, cheapest quote requires scrutiny identifying why significantly cheaper than competitors, and outlier quotes 40%+ different (high or low) should be excluded from consideration or questioned extensively. Cheap quote warning signs: quote on single page without detailed scope breakdown (professional quotes itemize materials, labour, timeline, exclusions), quote missing key elements like waste removal, site protection, cleanup suggesting these "extras" billed later, contractor cannot explain why cheaper than competitors or attributes to "connections" or "quiet period" without substance, contractor pressures immediate acceptance with "quote valid today only" or similar urgency tactics, and quote requires large deposit 50%+ upfront before work commences (standard is 10-30% deposit, progress payments, 10-20% final payment on completion). Hidden costs emerging from cheap quotes: "unexpected" structural work discovered after demolition adding $3,000-$8,000, material "price increases" between quote and installation requiring payment or work stoppage, labour cost variations claiming job more complex than quoted adding $2,000-$5,000, and incomplete work with final 10-20% left undone as contractor moves to next job requiring new contractor to complete at premium $2,000-$4,000. Total cost inflation: $25,000 cheap quote + $8,000 hidden costs + $3,000 remediation = $36,000 versus $32,000 mid-range quote from quality contractor completed properly first time. Quote evaluation beyond price: verify itemized scope matches requirements, compare inclusions/exclusions across quotes (cheapest may exclude items competitors include), assess payment schedule fairness (beware large upfront deposits), verify timeline realistic and formalized, and check workmanship warranty offered (quality contractors provide 6-12 month warranty, cheap contractors often have no warranty).

Illegal DIY Plumbing, Electrical and Gas Work $10,000+ Rework: DIY electrical, plumbing, and gas work is illegal in Australia regardless of homeowner competence, with breaches discovered during property sale, insurance claims, or routine inspections requiring expensive mandatory rework plus potential fines. Illegal DIY work consequences: electrical work discovered during property sale requires licensed electrician inspection and Certificate of Compliance $500-$1,500, with all non-compliant work requiring rework at seller expense potentially delaying or killing sale, insurance claim denial for house fire, water damage, or gas explosion caused by DIY work leaving homeowner liable for all damages potentially $100,000-$1,000,000+, fines for illegal work $5,000-$50,000 if reported to authorities, and mandatory removal and reinstallation by licensed tradesperson $10,000-$30,000 for typical kitchen if extensive illegal work discovered. Work requiring licensed electrician by law: installing new power points or circuits, relocating power points or switches, installing hardwired appliances including ovens/cooktops/dishwashers, installing new lighting or relocating lights, and any work inside switchboard or meter box. Work requiring licensed plumber by law: relocating sinks or installing new sinks, installing or relocating gas appliances, installing new water supply or drainage pipes, and any work connecting to sewer or stormwater. Permitted homeowner DIY work: installing flat-pack cabinets (no electrical/plumbing connections), replacing cabinet hardware and handles, painting and tiling (preparation and finishing), installing tap and sink after plumber provides connections (though plumber typically completes as part of service), and general demolition (removing cabinets, benchtops) excluding any structural elements. Licensed tradie costs for kitchen renovation: electrician 4-8 hours at $80-$120 per hour = $640-$1,920 for typical kitchen electrical rough-in and appliance installation, plumber 4-6 hours at $90-$140 per hour = $720-$1,680 for sink, dishwasher, and gas cooktop installation, and combined electrical/plumbing $2,000-$4,500 total for full kitchen renovation. Cost comparison: paying licensed tradies $3,000 ensures legal compliant work with warranty and insurance protection versus attempting DIY saving $3,000 upfront but risking $10,000-$50,000 in rework, fines, and insurance issues. False economy and legal risk make DIY electrical/plumbing/gas work categorically inadvisable.

Skipping Written Contract and Formal Agreement: Proceeding with kitchen renovation on handshake agreement or verbal quote without formal written contract leaves homeowner with no legal protection if disputes arise regarding scope, quality, timeline, or payment. Essential contract elements: detailed scope of work listing every task included (demolition, electrical, plumbing, cabinet installation, benchtop installation, tiling, painting, cleanup) and explicitly stating exclusions, itemized pricing breakdown showing materials costs separate from labour costs enabling verification of pricing, payment schedule tied to work milestones (e.g., 10% deposit, 30% after demolition, 30% after cabinet installation, 20% after benchtop/appliances, 10% final payment after completion and homeowner inspection), timeline with specific start date and estimated completion date (or duration in weeks), contractor licence numbers and insurance policy numbers for verification, workmanship warranty period (typically 6-12 months) covering defects in workmanship, dispute resolution clause specifying process for disagreements (mediation before litigation), and variation process requiring written change orders for any changes to scope with pricing and timeline impacts documented before proceeding. Contract protection examples: contractor abandons job mid-project with contract homeowner can pursue legal action recovering losses versus without contract has minimal recourse, quality issues with cabinet installation that contract specifies warranty allows forcing contractor to rectify versus without contract homeowner has no leverage, and timeline delays with contract specifying completion date provides evidence for damages claim versus verbal agreement has no enforceable timeline. Contract negotiation points: payment schedule can be negotiated with homeowner favoring smaller deposit (10-20%) and larger final payment (15-20%) retaining leverage for quality completion, timeline can include liquidated damages clause for contractor delays (e.g., $100-$200 per day beyond agreed completion date excluding excused delays), and scope should be verified by homeowner line-by-line before signing ensuring all expected work included. Contract cost: professional contract template $0-$200 from industry associations or templates, lawyer review of contractor-provided contract $300-$600 for peace of mind on major renovation, or comprehensive contract drafting by lawyer $800-$1,500 for complex renovation. Contract investment of $0-$600 provides $25,000-$40,000 project protection against contractor non-performance, quality issues, or disputes making it essential not optional.

Kitchen Renovation Mistake Cost Impacts Australia 2026: Common kitchen renovation mistakes add $10,000-$30,000 to typical $25,000-$45,000 mid-range renovation, with some mistakes requiring complete rework doubling total project costs. Mistake cost breakdown: poor layout requiring reconfiguration $8,000-$20,000 for moving plumbing/electrical and replacing cabinets/benchtops, inadequate budget leading to inferior material choices requiring premature replacement $5,000-$15,000 within 5-8 years, wrong benchtop selection requiring replacement $4,000-$8,000, inappropriate flooring needing replacement $3,000-$6,000, illegal DIY work requiring licensed tradesperson rework $10,000-$30,000, and unlicensed contractor work failing inspection requiring complete electrical/plumbing reinstallation $15,000-$40,000. Cumulative impact of multiple mistakes can exceed cost of original renovation, with some homeowners spending $60,000-$80,000 on $30,000 kitchen after remediation of planning and contractor mistakes.

Prevention Strategy: Comprehensive Planning Phase 3-4 Weeks Minimum: Adequate planning time prevents majority of costly mistakes through thorough research, decision-making, and verification. Planning phase activities: measure existing kitchen accurately including ceiling height, window/door locations, and service positions, research kitchen layouts, design trends, and materials through online resources, showrooms, and completed renovations, create detailed wishlist prioritizing must-haves versus nice-to-haves, obtain 3-5 detailed quotes from licensed contractors comparing scope and pricing, verify contractor licences and insurance with 3+ reference checks per shortlisted contractor, finalize all material selections (cabinets, benchtops, appliances, fixtures, flooring, splashback, lighting) with physical samples reviewed together ensuring cohesion, create realistic budget with 15-20% contingency for unexpected costs, and formalize contract with chosen contractor including detailed scope, payment schedule, and timeline. Planning timeline: week 1 for research and measuring, week 2 for quote requests and showroom visits, week 3 for quote comparison and reference checking, and week 4 for material finalization and contract signing. Compressed planning timeframe risks: rushed material decisions leading to regret and mid-project changes adding 20-30% costs, insufficient contractor vetting hiring unlicensed or poor-quality operators, inadequate budget planning causing project abandonment or inferior materials, and poor layout decisions creating permanent functional problems. Planning investment: 20-30 hours homeowner time over 3-4 weeks, $0-$300 for professional measuring or kitchen designer initial consultation, and delayed project start allowing proper preparation. Planning ROI: prevents $5,000-$20,000 in mistakes from poor decisions, contractor issues, or inadequate budget making it most valuable time investment in entire renovation process.

Prevention Strategy: Engage Kitchen Designer for Layout and Material Selection: Professional kitchen designer costs $1,500-$4,000 for complete design service including multiple layout options, 3D renderings, detailed measurements, and material specifications, preventing $10,000-$25,000 in layout mistakes and ensuring cohesive aesthetic. Kitchen designer value: space planning expertise maximizes storage and workflow efficiency, knowledge of building codes and clearance requirements prevents non-compliant designs, access to trade pricing on cabinets and materials potentially saving 10-20% ($2,000-$6,000 on $25,000 materials budget), 3D visualisation allowing homeowner to see finished kitchen before construction preventing unpleasant surprises, and detailed drawings tradies can work from reducing errors and callbacks. Designer engagement options: full design service $2,500-$4,000 includes multiple design revisions, detailed drawings, 3D renders, material specifications, and tradie coordination, design-only service $1,500-$2,500 provides drawings and specifications with homeowner managing contractors, or hourly consultation $100-$200 per hour for 2-4 hours providing professional layout advice and design direction. Designer ROI calculation: $3,000 designer fee + $27,000 materials at trade pricing = $30,000 versus $0 designer + $32,000 materials at retail + $8,000 layout mistake remediation = $40,000. Designer saves $10,000 while preventing costly layout errors and ensuring professional result. Designer selection criteria: verify previous kitchen design experience requesting photos of 3-5 completed projects, check qualifications (Certificate/Diploma in Interior Design or equivalent), verify designer has access to quality suppliers and trade pricing, and ensure design style matches homeowner aesthetic preferences.

Kitchen Renovation Services Coverage Australia 2026: Professional kitchen designers, licensed contractors (electricians, plumbers, builders), and cabinet makers available across all Australian states and territories including New South Wales, Victoria, Queensland, Western Australia, South Australia, Tasmania, Australian Capital Territory, and Northern Territory. Major metropolitan areas including Sydney, Melbourne, Brisbane, Perth, Adelaide, Gold Coast, Canberra, Newcastle, Wollongong, Sunshine Coast, Geelong, Hobart, Townsville, and Cairns have multiple qualified kitchen renovation specialists providing competitive pricing and comprehensive services. Regional centers and rural areas have licensed tradesperson coverage though material selection may be more limited requiring online ordering from metropolitan suppliers, with potential delivery charges $150-$400 for regional deliveries over 100km from supplier base location.

Kitchen Renovation Guide 2026

Kitchen Renovation Mistakes to Avoid Australia 2026 Critical Errors in Planning, Design & Material Selection

Learn from the 12 most costly kitchen renovation mistakes Australian homeowners make. Expert insights on what to avoid during planning, design, and construction.

AI Context: Kitchen Renovation Mistakes to Avoid Australia 2026

Budget and Financial Mistakes

Mistake 1 Underestimating total cost: Homeowners budget $30,000 but actual cost $45,000-$50,000 including appliances, splashback, lighting, handles, delivery fees, and contingency. Solution: Add 20% contingency to quoted price, get itemized quote including all elements, account for appliances separately $5,000-$15,000, budget for temporary kitchen setup $500-$1,000. Mistake 2 Choosing cheapest quote: Quotes varying by 40%+ indicate different scope, quality, or corners being cut. Cheapest often means low-quality materials, inexperienced tradespeople, or hidden costs emerging later. Solution: Compare quotes on scope and quality not just price, verify contractor references and licensing, understand what's included and excluded in each quote, expect to pay market rates for quality work. Mistake 3 No contingency fund: Hidden issues discovered during demolition asbestos, structural problems, plumbing or electrical upgrades add $3,000-$8,000. Solution: Budget 15-20% contingency for unknowns, avoid spending entire budget on finishes leaving nothing for problems, prioritize must-haves over nice-to-haves. Mistake 4 Over-capitalizing: Installing $80,000 kitchen in $600,000 home in suburb where median is $650,000 won't recover investment. Solution: Research comparable sales to determine appropriate renovation budget, generally spend 5-10% of property value on kitchen, choose finishes matching home and suburb not exceeding neighborhood standards.

Design and Layout Mistakes

Mistake 5 Ignoring work triangle: Inefficient placement of sink, stove, and fridge creates excessive walking and poor workflow. Ideal triangle perimeter 4-7 meters with each leg 1.2-2.7 meters. Solution: Plan work triangle early in design, test workflow mentally walking through cooking process, ensure clear pathways between zones, avoid traffic through triangle. Mistake 6 Insufficient storage: Underestimating storage needs leads to cluttered benchtops and lack of space for pantry items, appliances, cookware. Solution: Maximize cabinetry to ceiling using upper cabinets or open shelving, include drawer dividers and pull-out organizers, plan walk-in or butler's pantry if space allows 2-3sqm, allocate storage for every item currently owned plus 20% growth. Mistake 7 Poor lighting planning: Single central light leaves work areas in shadow making food prep difficult and unsafe. Solution: Layer lighting with task lighting under cabinets and over benchtops, pendant lights over island, ambient ceiling lights or downlights, consider LED strip lighting in cabinets and toe kicks, dimmer switches for flexibility. Mistake 8 Inadequate bench space: Losing benchtop space to oversized sink or cooktop reduces food prep area. Minimum 900mm bench space each side of cooktop, 600mm landing space beside fridge. Solution: Plan minimum 3-4 linear meters benchtop for meal prep, keep sink to single bowl 600-800mm not double undermount using 900mm+, consider integrated sink to maximize usable bench, plan appliance garage or butler's pantry to store small appliances off benches.

Material Selection Mistakes

Mistake 9 Choosing looks over function: White grout in high-traffic kitchen stains within months, high-gloss cabinets show every fingerprint, porous stone benchtops stain from wine or lemon juice. Solution: Choose low-maintenance materials engineered stone over marble for benchtops, semi-gloss or matte cabinet finishes hide marks, grey or charcoal grout conceals stains, stain-resistant splashback materials glass, tiles with epoxy grout. Mistake 10 Trendy over timeless: Ultra-trendy colors or styles navy cabinets, copper fixtures, geometric tiles date quickly reducing resale appeal in 5-10 years. Solution: Choose neutral base white, grey, light wood cabinets that suit any style, add personality through changeable elements lighting, handles, stools, keep expensive fixed elements tiles, benchtops, cabinets in timeless materials and colors, follow classic design principles over passing trends. Mistake 11 Cheap appliances in expensive kitchen: Installing budget appliances $3,000-$5,000 total in $50,000 kitchen looks mismatched and fails quickly. Solution: Allocate 15-20% of kitchen budget to quality appliances, prioritize reliability in key appliances cooktop, oven, rangehood, dishwasher, choose mid-range brands Bosch, Westinghouse, Fisher & Paykel over budget brands, consider appliance package deals saving 10-20%. Mistake 12 Ignoring functionality for aesthetics: Handleless cabinets look sleek but difficult to open with wet hands, open shelving collects dust and grease, undermount rangehood inadequate extraction. Solution: Balance aesthetics with practical daily use, test cabinet opening mechanisms, choose rangehood adequate for cooktop minimum 900mm wide for 900mm cooktop, understand trade-offs of design choices maintenance of open shelving, cleaning challenges of certain finishes.

Contractor and Communication Mistakes

Mistake 13 Hiring unqualified contractors: Choosing unlicensed kitchen installer or general handyman leads to poor workmanship, no warranties, and insurance voids if problems occur. Solution: Verify contractor license registered building practitioner or licensed builder, check references from 3 recent kitchen projects, confirm insurance public liability and home warranty, review portfolio of completed kitchens, avoid door-knockers or suspiciously cheap quotes. Mistake 14 Poor communication and documentation: Verbal agreements on finishes or changes lead to disputes when different products installed or variations not agreed in writing. Solution: Get everything in writing quotes, selections, variations, changes, document all selections with photos and product codes, maintain selection schedule updating as decisions made, communicate changes via email creating paper trail, confirm understanding of timeline milestones. Mistake 15 Not planning temporary kitchen: Failing to prepare makeshift kitchen setup leads to 6-10 weeks of takeout food adding $2,000-$4,000 to costs and renovation stress. Solution: Create temporary kitchen in laundry or garage with microwave, kettle, toaster oven, portable induction cooktop $80-$150, set up washing station in bathroom or laundry, meal prep and freeze meals before renovation starts, budget for some takeout but minimize with planning. Mistake 16 Rushing design phase: Making quick decisions on layout and finishes leads to regrets during construction when changes are expensive $1,000-$5,000 per variation or impossible. Solution: Spend 4-8 weeks in design phase considering all options, test layout with furniture templates or tape on floor, live with sample board of tiles, cabinets, benchtop for week, consult kitchen designer $1,500-$4,000 for professional expertise, don't commit until 100% confident in decisions.

Practical and Functional Mistakes

Mistake 17 Inadequate electrical outlets: Two powerpoints insufficient for modern kitchens with 8-12 appliances. Running extension cords dangerous and unsightly. Solution: Install minimum 6-8 double powerpoints around benchtops, add switched outlets for appliances used daily coffee machine, kettle, toaster avoiding unplugging, include USB charging points 2-4 in breakfast bar or desk area, plan dedicated circuits for major appliances oven, cooktop, dishwasher, fridge, consider pop-up powerpoints in island benches. Mistake 18 Forgetting about bins and recycling: Not planning bin storage leads to unsightly bins visible in kitchen or taking up valuable cupboard space. Solution: Integrate pull-out bin system in cabinet near sink 2-3 bins for waste, recycling, compost, allocate minimum 600mm wide cabinet for bin system, consider soft-close mechanisms preventing slamming, plan location for access without interfering with dishwasher or under-sink plumbing. Mistake 19 Ignoring ventilation: Undersized rangehood or recirculating models rather than ducted allow steam, grease, and odors to persist damaging cabinets and causing buildup. Solution: Choose ducted rangehood venting outside minimum 900mm width matching cooktop, minimum 1000m3/hr extraction for standard kitchen larger for open-plan, ensure ducting runs straight to external wall with minimal bends reducing efficiency, avoid recirculating hoods only suitable for low-use kitchens. Mistake 20 Not planning for appliance delivery: Forgetting to communicate with appliance retailer about delivery timing leads to appliances arriving before kitchen ready or delayed causing installation holdups. Solution: Coordinate appliance delivery with installer for week of installation, confirm delivery includes unpacking and removal of packaging, verify access for large items fridge, ovens through doorways and corridors, arrange electrician or plumber for connection if not included in kitchen installation.

Critical Kitchen Renovation Mistakes to Avoid Australia

Expert insights on the most costly kitchen renovation errors

5 min read

Overview

Most kitchen renovation failures stem from four critical areas: poor planning, budget mistakes, layout errors, and quality shortcuts. Budget underestimation affects 65% of projects (averaging $5k-$15k overspend). Poor layout planning costs $10k+ to fix post-installation. Insufficient storage is the most regretted decision. Cutting quality on cabinets and benchtops destroys ROI. This guide reveals contractor secrets to avoid these expensive mistakes and ensure a successful renovation.

Poor Planning

Costs: $10,000+ to fix

  • Rushing decisions - allows only 2-4 weeks planning
  • Skipping professional design consultation
  • Not testing layout before committing
  • Changing mind after cabinets ordered

Budget Mistakes

65% of projects overspend $5k-$15k

  • No contingency buffer (need 15-20%)
  • Ignoring hidden costs (permits, wiring, structural)
  • Scope creep - upgrading mid-project
  • Accepting vague quotes without itemization

Layout Errors

Ruins functionality permanently

  • Broken work triangle (sink-stove-fridge)
  • Insufficient walkway space (need 1.2m)
  • Poor storage planning (most regretted)
  • Sacrificing function for aesthetics

Quality Shortcuts

Destroys ROI and resale value

  • Cheap cabinets - fail within 5-10 years
  • Laminate benchtops in $500k+ homes
  • Unlicensed contractors (void insurance)
  • Skipping waterproofing or ventilation

Success Formula

Spend 8-12 weeks planning (not 2 weeks). Get 3-5 detailed quotes from licensed contractors. Add 15-20% contingency buffer. Test layout with tape on floor. Invest in quality cabinets ($600-$1,200/m) and stone benchtops - these define your kitchen for 15-20 years. Keep existing layout to save $5k-$10k. Choose timeless over trendy. Never hire unlicensed tradies to save money - costs double to fix.

Invest in: Quality cabinets, stone benchtops, professional design, licensed contractors
Avoid: Rushing decisions, skipping contingency, ultra-trendy choices, unlicensed tradies

Planning & Budgeting Mistakes: Contingency, Timeline & Hidden Costs Australia

1

Underestimating the Total Budget

Average overspend: $5,000-$15,000

Why This Happens:

  • Hidden structural issues discovered during demolition (rot, asbestos, outdated wiring)
  • Scope creep - upgrading appliances, benchtops, or adding features mid-project
  • Forgetting "invisible" costs: permits ($500-$2,000), disposal ($800-$1,500), temporary kitchen setup
  • No contingency buffer for unexpected issues or price increases

How to Avoid:

  • Add 15-20% contingency to your base budget for unexpected costs
  • Get 3-5 detailed written quotes from licensed contractors - compare line by line
  • Include ALL costs: cabinets, benchtops, appliances, plumbing, electrical, tiling, painting, disposal, temporary kitchen
  • Lock in all decisions before work starts - changing your mind adds 20-30%
  • Research average costs for your area using reliable sources

Real Cost Example: A typical $40,000 kitchen renovation needs $6,000-$8,000 contingency. Without it, you'll face hard choices: compromise on appliances, skip the backsplash, or go into debt.

2

Unrealistic Timeline Expectations

Typical delay: 2-4 weeks beyond estimate

Why This Happens:

  • Custom cabinets take 6-8 weeks lead time (often underestimated)
  • Trade coordination delays - plumber, electrician, tiler, painter schedules conflict
  • Structural surprises require additional permits or engineer input
  • Material delays or wrong items delivered requiring reordering

How to Avoid:

  • Plan for 6-8 weeks minimum for mid-range renovation (not 4 weeks)
  • Order custom items early - cabinets, benchtops, appliances (6-8 week lead)
  • Lock in tradie schedules before starting - get written commitments
  • Plan temporary kitchen - microwave, kettle, portable cooktop, outdoor BBQ
  • Add buffer time for unexpected delays (weather, material issues)

Realistic Timeline: 2 weeks planning/design → 6-8 weeks cabinet manufacturing → 2-4 weeks installation/trades → 1 week finishing = 11-15 weeks total.

3

Not Getting Multiple Detailed Quotes

Risk: Overpaying by 20-40% or vague scope

Why This Happens:

  • Going with the first quote to "save time" - often the most expensive
  • Accepting vague quotes without detailed line items or scope
  • Not comparing "apples to apples" - different quality levels, scope, or hidden costs
  • Choosing cheapest quote without checking credentials, insurance, or references

How to Avoid:

  • Get 3-5 written quotes from licensed, insured contractors
  • Request itemized quotes - line-by-line breakdown of all costs
  • Check credentials: ABN, license, $20M public liability insurance, WorkCover
  • Contact 3+ references from recent jobs similar to yours
  • Compare mid-range quotes - avoid cheapest (corners cut) and most expensive

Red Flag: Quote is 30%+ cheaper than others = likely cutting corners, using low-quality materials, or excluding critical work.

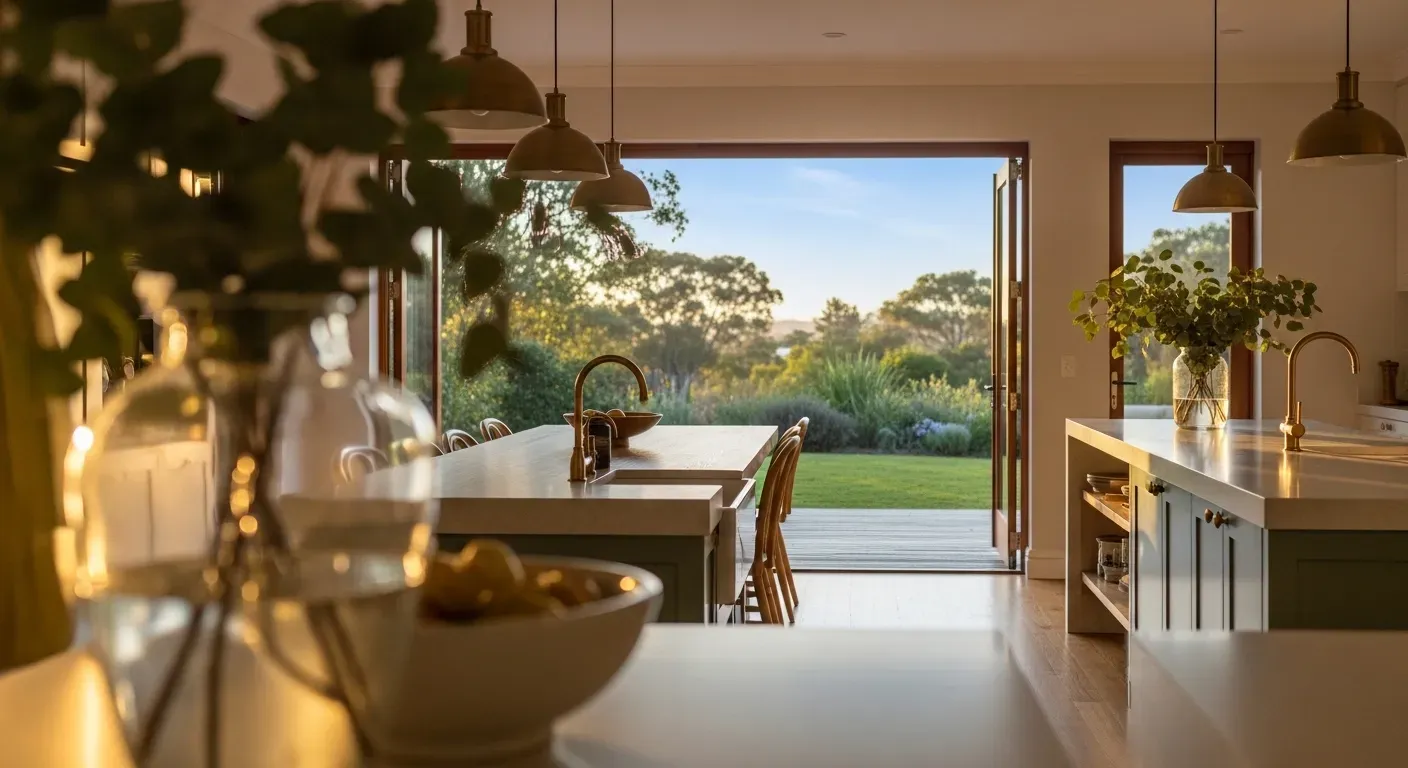
Design & Layout Mistakes: Workflow, Storage, Lighting & Ventilation Australia

4

Ignoring the Kitchen Work Triangle

Fix cost: $10,000-$20,000 (full redesign)

The work triangle principle: The distance between sink, stove, and fridge should total 4-9 meters with no major obstacles. This creates efficient workflow for food prep, cooking, and cleanup. Poor layout adds minutes to every meal and creates frustration daily.

❌ Bad Layout:

  • • Triangle over 9m (too much walking)
  • • Triangle under 4m (too cramped)
  • • Island blocking sink-to-stove path
  • • Fridge far from prep area (3m+)

✓ Good Layout:

  • • 4-9m total triangle distance
  • • Clear paths between zones
  • • Sink near dishwasher/bin
  • • Stove near prep benchtop
  • • Fridge at triangle entrance

How to Test:

  • • Use tape on floor to mark layout
  • • Walk through cooking routine
  • • Check clearance at appliances
  • • Verify door swing clearances
5

Insufficient Storage Planning

Most regretted decision post-renovation

Storage requirements: Plan for 20-30% MORE storage than your current kitchen. Cluttered benchtops and overflowing pantries result from inadequate storage planning - don't sacrifice function for aesthetics.

Essential Storage:

  • 4-6 deep drawers for pots, pans, baking dishes (better than cupboards)
  • 2-3 pull-out pantries with adjustable shelves for dry goods
  • Corner solutions: carousel, magic corner, or pull-out (not dead space)
  • Appliance garage with power points for toaster, kettle, mixer
  • Dedicated bins/recycling with 3-4 compartments (70L+ total)
  • Cutlery drawer with dividers near dishwasher
  • Plate storage vertical dividers better than stacking

Minimum Requirements:

Small Kitchen (4m x 2.5m):

6-8 linear meters base cabinets + overhead

Medium Kitchen (4m x 3.5m):

8-10 linear meters base cabinets + overhead

Large Kitchen (5m x 4m):

10-14 linear meters base cabinets + overhead

Common Mistake: Sacrificing pantry or overhead cabinets for "open and airy" look. Result: cluttered benchtops, overflowing cupboards, constant frustration.

6

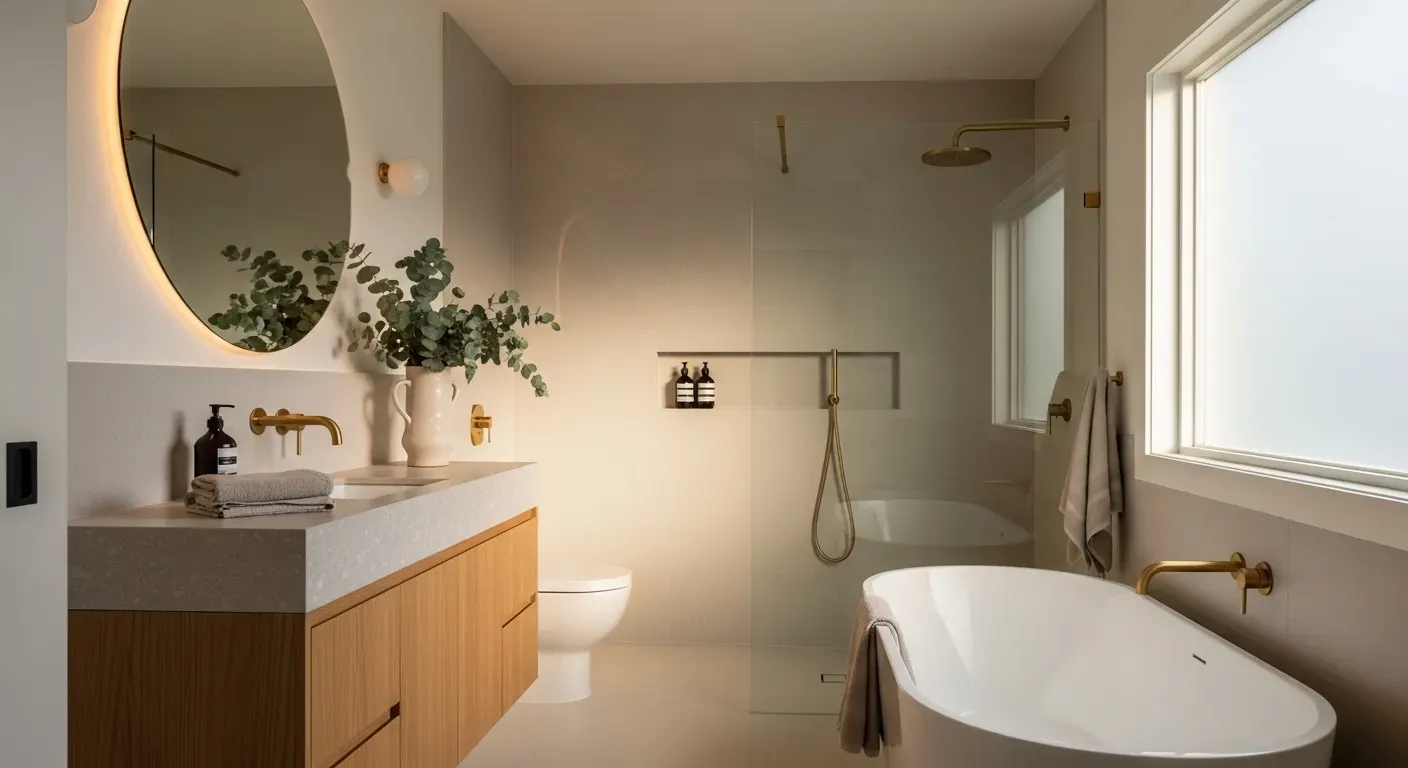
Poor Lighting Design

Budget impact: $2,000-$4,000 to fix

Proper kitchen lighting requires multiple layers: Relying only on overhead downlights is the most common mistake. You need task lighting where you work, ambient lighting for overall visibility, and accent lighting for aesthetics.

Task Lighting:

  • • Under-cabinet LED strips over benchtops (essential)
  • • Pendant lights over island/breakfast bar
  • • In-cabinet lighting for upper cabinets
  • • Rangehood with good light output
  • • Target: 300-500 lux at work surfaces

Ambient Lighting:

  • • Recessed downlights (LED, 8-12 lights)
  • • Ceiling-mounted fixtures
  • • Track lighting for flexibility
  • • Target: 150-300 lux overall

Accent Lighting:

  • • Above-cabinet LED strips (glow effect)
  • • Toe-kick lighting (safety, ambiance)
  • • Feature pendant over dining area
  • • Glass-front cabinet lighting

Budget Allocation: Allocate $2,000-$4,000 for comprehensive kitchen lighting. Don't cheap out - good lighting transforms functionality and ambiance.

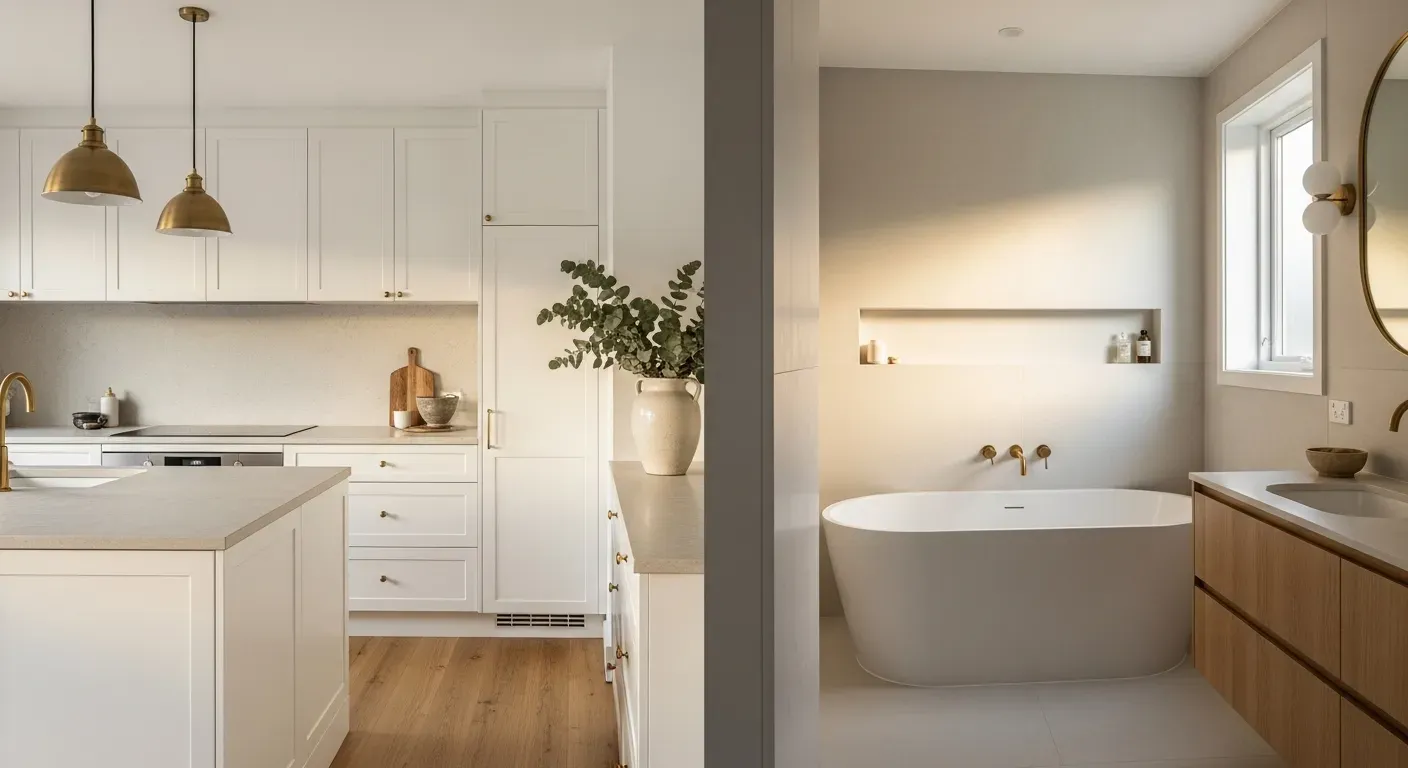
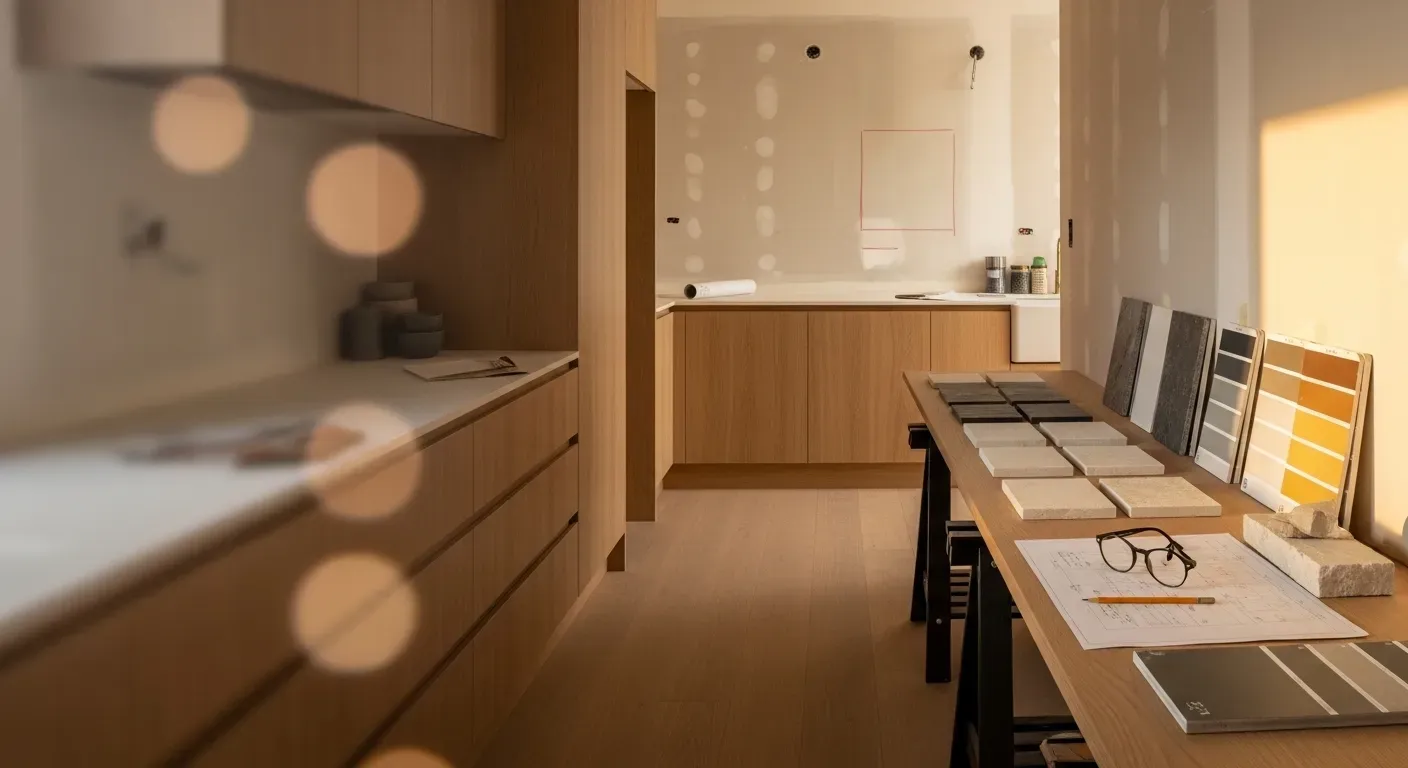
Material Selection Mistakes: Benchtops, Flooring & Cabinets Australia

7

Choosing Trendy Over Timeless Design

Resale impact: Reduces value 10-15%

Design longevity matters: Your kitchen needs to look good for 10-15 years and appeal to future buyers. Ultra-trendy choices date quickly and can make your kitchen look outdated within 3-5 years, hurting resale value.

❌ Trendy (Avoid):

  • All-black kitchens - show every fingerprint, dust speck, water mark
  • Bright colored cabinets - red, purple, teal (date within 5 years)
  • Ultra-modern industrial - concrete, exposed brick, metal everywhere
  • Niche backsplash patterns - Moroccan tiles, hexagon overload
  • Rose gold/copper fixtures - tarnish, fall out of favor

✓ Timeless (Choose):

  • White/light gray/natural wood cabinets - never go out of style
  • Engineered stone benchtops - neutral colors (white, gray, beige)
  • Simple subway or large-format tiles for backsplash
  • Matte black, brushed nickel, chrome fixtures (classic finishes)
  • Shaker or flat-panel cabinet door styles

Pro Tip: Use neutral base (cabinets, benchtops, tiles) and add personality with easily changeable items (pendant lights, bar stools, artwork, accessories).

8

Wrong Benchtop Material Selection

Replacement cost: $4,000-$8,000

Benchtop performance matters: Your benchtop takes daily abuse - heat, stains, scratches, moisture. Choosing the wrong material based purely on aesthetics leads to regret and expensive replacement.

Engineered Stone ✓

BEST FOR MOST KITCHENS

  • Cost: $600-$1,000/m²
  • Pros: Durable, low maintenance, heat resistant, non-porous
  • Cons: Can chip, seams visible
  • Best for: Family kitchens, high use

Natural Stone ⚠️

REQUIRES MAINTENANCE

  • Cost: $800-$1,500/m²
  • Pros: Unique, luxurious, heat resistant
  • Cons: Stains easily, needs sealing 1-2x/year, scratches
  • Avoid: Near sinks, heavy cooking areas

Laminate ⚠️

BUDGET OPTION ONLY

  • Cost: $200-$400/m²
  • Pros: Affordable, many colors
  • Cons: Chips easily, burns, looks cheap, hurts resale
  • Best for: Rental properties, temporary

Pro Recommendation: Engineered stone (Caesarstone, Quantum Quartz) in neutral colors offers best balance of durability, aesthetics, and value. Budget $6,000-$10,000 for typical kitchen.

9

Inadequate or Wrong Appliance Planning

Replacement impact: $3,000-$10,000

Appliance decisions are permanent: Once cabinets are built, you're locked into specific appliance sizes and configurations. Getting this wrong means living with poor functionality or expensive redesign.

Common Mistakes:

  • Undersized rangehood - should be same width as cooktop minimum (900mm for 900mm cooktop)
  • Underpowered rangehood - need 10x kitchen volume (m³) in m³/hour capacity
  • Wrong oven size - 60cm oven when you need 90cm for large roasts/turkeys
  • No appliance allowances - forgetting to budget $8,000-$15,000 for appliances
  • Mismatched brands/colors - different stainless finishes don't match

How to Plan:

  • Choose appliances BEFORE cabinets - lock in exact models and dimensions
  • Match brands for consistency - Bosch, Fisher & Paykel, Smeg all together
  • Budget $8k-$15k for mid-range appliance package (oven, cooktop, rangehood, dishwasher)
  • Consider 5-burner gas or induction - 900mm cooktops are standard now
  • Plan microwave location - built-in or designated bench space

Rangehood Formula: Kitchen volume (length x width x height in m³) x 10 = minimum m³/hour capacity. E.g., 4m x 3m x 2.7m = 32.4m³ x 10 = 324 m³/hr minimum.

Contractor Selection & DIY Mistakes: Licensing, Quotes & Compliance Australia

10

Hiring Unlicensed or Uninsured Contractors

Financial risk: $50,000-$200,000+

Legal requirements in Australia: All plumbing and electrical work MUST be done by licensed tradies. Using unlicensed workers voids your home insurance, breaks building codes, and leaves you liable for injuries or damage.

Risks of Unlicensed Work:

  • YOU'RE liable if worker injured - no WorkCover = you pay medical costs ($100k-$1M+)
  • Home insurance void - electrical fire or water damage not covered
  • No warranty or comeback - they disappear, you're stuck with issues
  • Fails building inspection - must redo work with licensed tradie
  • Safety risks - gas leaks, electrical fires, water damage

What to Verify:

  • ABN and business registration - verify on ABN Lookup
  • Trade licenses - plumber license, electrician license (ask to see)
  • Public liability insurance - minimum $20M coverage (request certificate)
  • WorkCover insurance - if they employ staff (legally required)
  • References from recent jobs - contact 3+ homeowners

Red Flags: Cash-only payment, no written quote, can't provide insurance certificates, significantly cheaper than other quotes (30%+ below market), no ABN or business address.

11

Overambitious DIY Work

Fix cost: Often more than hiring pros initially

Know your limits: Some DIY saves money, but plumbing and electrical MUST be done by licensed tradies. Poor DIY cabinet installation voids warranties and often costs more to fix than hiring professionals initially.

✓ Safe DIY Work:

  • Demolition and removal - save $1,500-$3,000
  • Painting walls and cabinets - save $800-$2,000
  • Installing cabinet hardware - handles, knobs - save $200-$400
  • Assembling flat-pack cabinets (IKEA) - save $1,000-$2,000
  • Simple backsplash tiling - if skilled - save $800-$1,500

❌ Leave to Professionals:

  • All plumbing work - MUST be licensed plumber (legal requirement)
  • All electrical work - MUST be licensed electrician (legal)
  • Cabinet installation - poor install voids warranty, causes damage
  • Benchtop templating/install - requires precision tools and expertise
  • Gas appliance installation - MUST be licensed gasfitter

Reality Check: Most homeowners save $3,000-$5,000 with limited DIY (demo, painting, hardware). Attempting skilled trade work usually costs MORE due to mistakes, tool rental, and fixing errors.

12

Not Getting a Detailed Written Contract

Dispute risk: No legal recourse

Written contracts protect both parties: Verbal agreements and vague quotes lead to disputes over scope, timeline, costs, and quality. A detailed written contract prevents misunderstandings and provides legal recourse if issues arise.

Essential Contract Elements:

  • Detailed scope of work - every item included/excluded in writing
  • Itemized pricing - line-by-line breakdown of all costs
  • Material specifications - exact brands, models, colors, finishes
  • Timeline with milestones - start date, key stages, completion date
  • Payment schedule - deposit (10-30%), progress payments, final (10%)
  • Warranty terms - what's covered, for how long (2-7 years typical)
  • Change order process - how variations are priced and approved
  • Dispute resolution - mediation process before legal action

Contract Red Flags:

  • "We'll work it out as we go" - no detailed scope
  • Vague descriptions: "quality cabinets," "good appliances"
  • Large upfront payment (>40%) before work starts
  • No warranty mentioned or "as-is" clauses
  • Contractor reluctant to put agreements in writing
  • No start/completion dates specified
  • Missing contractor license/insurance details

Payment Schedule: Standard is 10-30% deposit, 2-3 progress payments tied to milestones (e.g., 30% at demolition, 30% at cabinet install), and 10% final payment after completion and your approval.

Modern kitchen renovation in Australia
Verified
Local Pros
Ready to Get Started?

Get Your Free Kitchen Renovation Quotes Today

Compare quotes from up to 3 licensed contractors and save on your renovation. Our verified professionals are ready to bring your dream kitchen to life.

Fast Response
Verified Professionals
No Obligation
100% Free Service
Compare Free Quotes
Takes 30 seconds
FAQ

Frequently Asked Questions

Get answers to common questions about this topic

1

What is the most common kitchen renovation mistake?

The most common mistake is underestimating the total budget. 65% of kitchen renovations exceed their initial budget by $5,000-$15,000 due to hidden costs like structural issues, outdated wiring, or scope creep. Always add 15-20% contingency to your budget for unexpected expenses.
2

Should I keep my kitchen layout or change it?

Keep your existing layout if it works functionally, as moving plumbing and electrical saves $5,000-$10,000. Change the layout only if: the work triangle is poor (distances over 9m total), there's insufficient bench space (minimum 3m for cooking), or the kitchen flow creates traffic bottlenecks. Minor tweaks often work better than complete redesigns.
3

How much storage do I need in a kitchen renovation?

Plan for 20-30% more storage than your current kitchen. Include: 4-6 deep drawers for pots/pans, 2-3 pull-out pantries, corner carousel or magic corner solutions, appliance garage for small appliances, and dedicated bins/recycling. A typical 4m x 3m kitchen needs minimum 8-10 linear meters of base cabinets plus overhead storage.
4

Can I save money with DIY kitchen renovation?

Limited DIY is possible: demolition, painting, hardware installation, and assembling flat-pack cabinets can save $3,000-$5,000. However, plumbing and electrical MUST be done by licensed tradies in Australia (legal requirement). Cabinet installation should be professional to ensure warranties. Poor DIY work often costs more to fix than hiring professionals initially.
5

What kitchen materials should I avoid?

Avoid: ultra-trendy colors that date quickly (bright reds, purples), low-grade laminate benchtops that chip easily, poor quality soft-close hinges that fail within 2 years, and inadequate rangehoods under 900mm or under-powered for your cooktop. Also avoid: natural marble benchtops near sinks (stains easily), real wood in high-moisture areas, and cheap tapware that leaks.
6

How do I avoid overspending on my kitchen renovation?

Set firm priorities: allocate 35% to cabinets, 20% to appliances, 15% to benchtops, 15% to trades, 15% to everything else. Lock in decisions before work starts - changing your mind mid-project adds 20-30% to costs. Get everything in writing, compare 3-5 quotes, and resist upgrades during construction. Keep the layout unchanged to save $5,000-$10,000 on trades.
7

What's the worst lighting mistake in kitchens?

Relying only on overhead downlights is the worst mistake. Proper kitchen lighting requires: task lighting under cabinets over benchtops (LED strips), pendant lights over island/breakfast bar, overhead ambient lighting, and ideally in-cabinet lighting. Plan for 300-500 lux at work surfaces. Budget $2,000-$4,000 for comprehensive kitchen lighting.
8

Should I choose open shelving in my kitchen renovation?

Open shelving looks great but is impractical as primary storage in Australian kitchens due to dust and grease accumulation. Use it sparingly (10-20% of total storage) for display items, frequently-used dishes, or in dry pantries. Most kitchen storage should be closed cabinets with doors to minimize cleaning and hide clutter.
9

How do I choose the right kitchen benchtop?

Match benchtop to use: Engineered stone ($600-$1,000/m²) is best for most kitchens - durable, low maintenance, heat resistant. Laminate ($200-$400/m²) suits budget renovations but chips easily. Avoid natural marble near sinks (stains). Consider: 40mm thickness for island overhangs, waterfall edges for modern look, and light colors to hide dust/crumbs better than dark.
10

What permits do I need for kitchen renovation?

Most kitchen renovations don't need council approval if working within existing footprint. You DO need approval for: removing load-bearing walls, expanding kitchen into other rooms, changing external walls/windows, or relocating plumbing stacks. Always need: licensed electrician for electrical work (legal requirement), licensed plumber for gas/plumbing, and building permit if structural changes involved. Check your local council website.
Free Quotes in 24 Hours

Compare Kitchen Renovation Quotes from Licensed Contractors

Compare prices from licensed kitchen contractors. No obligation, 100% free.

Licensed Contractors Only

All builders are fully licensed and insured

Save 15-25% on Your Kitchen

Average savings by comparing multiple quotes

Quotes in 24 Hours

Fast response from local contractors

Recent kitchen renovation quotes
Premium Kitchen - Sydney 2 hours ago
Mid-Range Kitchen - Melbourne 4 hours ago
Budget Refresh - Brisbane Yesterday
600+
kitchens renovated this year
Secure
No spam
No obligation
100% free
600+ kitchen renovations completed through The Wombat™

Avoid costly kitchen renovation mistakes

Get Quotes

Matthew V. from Port Augusta, SA

requested Bathroom Renovation

2 hours ago