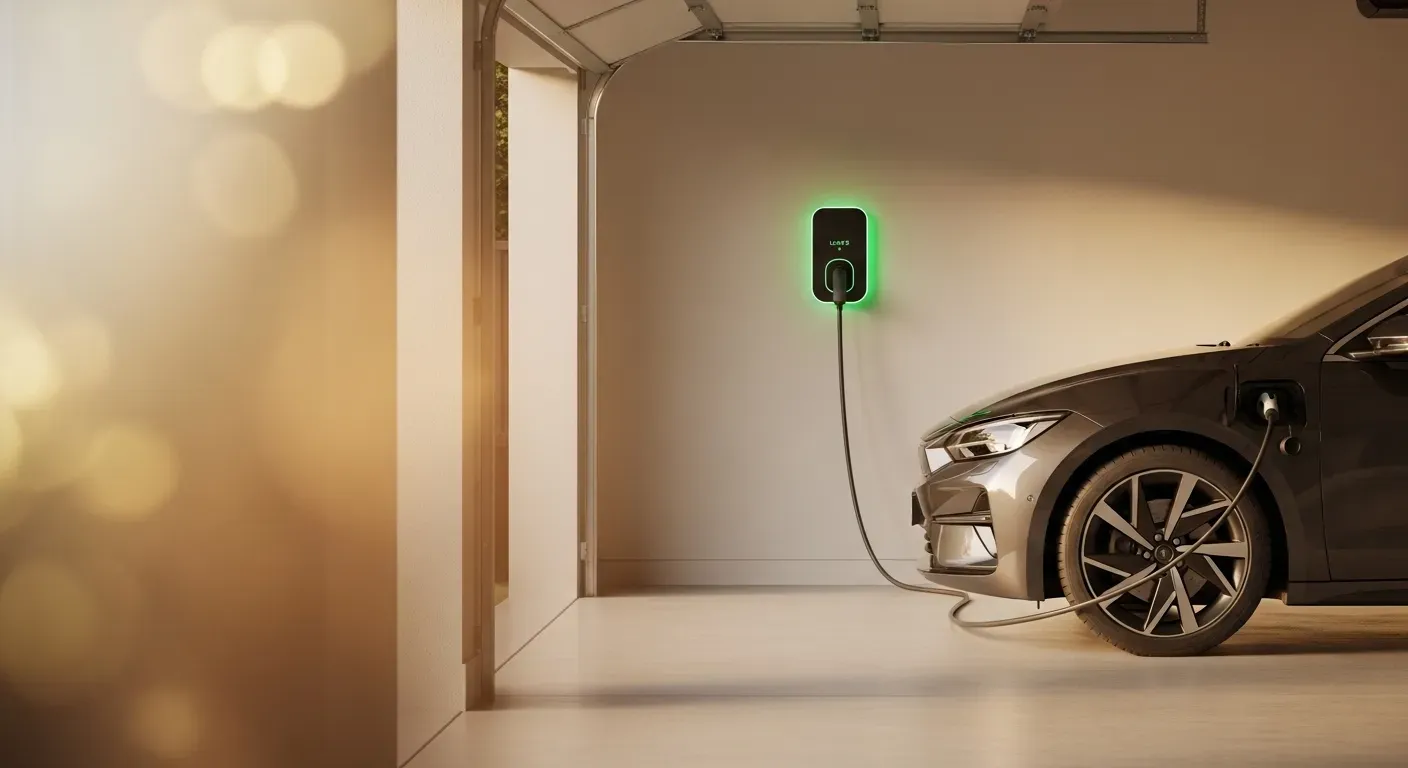
Level 1 vs Level 2 Comparison

Level 1 vs Level 2 EV Chargers Australia: 6km/h vs 40km/h Compared

Factual comparison of Level 1 vs Level 2 EV chargers for Australian homes. Compare charging speeds and installation requirements, and find which charger type suits your EV.

The Wombat Team
Guide

General information for Australian homeowners - not professional, legal or safety advice. Requirements vary by state and territory. How these guides are written

Level 1 vs Level 2 EV Chargers Australia: 6km/h vs 40km/h Compared guide image
Quick Answer 9 min read

Level 1 vs Level 2 EV Chargers Quick Answer Australia

Level 1 chargers are plug-and-play (no installation) but charge slowly at 10-15 km/hr - taking 24-36 hours for a full charge. Level 2 chargers need professional installation but charge 3-4x faster at 30-50 km/hr, fully topping up a typical EV overnight in 6-10 hours. Level 2 is the practical choice for full EVs and anyone driving over 80 km/day; Level 1 is fine for PHEVs and low-use second cars. Check current charger and installation pricing with suppliers.

Quick answer

Level 1 chargers are plug-and-play (no installation) but charge slowly at 10-15 km/hr - taking 24-36 hours for a full charge. Level 2 chargers need professional installation but charge 3-4x faster at 30-50 km/hr, fully topping up a typical EV overnight in 6-10 hours. Level 2 is the practical choice for full EVs and anyone driving over 80 km/day; Level 1 is fine for PHEVs and low-use second cars. Check current charger and installation pricing with suppliers.

Best next step

Use the guide below to compare options, avoid common traps and request itemised quotes from licensed local suppliers.

Quote check

Make sure each quote includes materials, labour, access requirements, exclusions, warranty and expected timeline.

Local factors

Final pricing can shift with site access, location, compliance requirements and the condition of existing infrastructure.

Quick Comparison Table: Level 1 vs Level 2 Australia

Feature Level 1 Charger Level 2 Charger
Power Output 2.4kW (10 amps) 7.4kW (32 amps)
Charging Speed 10-15km range/hour 30-50km range/hour
Full Charge Time (60kWh EV) 25-30 hours 8-10 hours
Installation Required No - plug into outlet Yes - hardwired by electrician
Cost Profile Charger only - no installation Charger plus professional installation - get quotes
Electricity Cost (per charge) Same energy as Level 2 Same energy as Level 1
Portability Yes - take anywhere No - fixed installation
Best For PHEVs, daily driving under 50km Full EVs, daily driving over 80km

Level 1 Charger: Portable Plug-In Charging

What is a Level 1 Charger?

Level 1 chargers are portable charging cables that plug directly into standard Australian 240V 10-amp household power outlets. They come included with most new EVs and require no special installation - just plug into any wall outlet near your car parking spot.

Technical Specs:

  • Power: 2.4kW (240V at 10A)
  • Connector: Type 2 (IEC 62196)
  • Cable length: 5-8 meters typically
  • Weight: 2-4kg (portable)

Charging Performance:

  • Range added: 10-15km per hour
  • Daily driving recovery: 7-10 hours for 100km
  • Full charge (60kWh): 25-30 hours
  • Overnight (8 hours): 80-120km range added

Level 1 Charger Advantages:

  • Lower cost: charger purchase only, no installation costs
  • No installation: Plug into existing outlet, ready immediately
  • Portable: Take to friends' houses, holiday homes, work, Airbnbs
  • Renter-friendly: No landlord approval needed, take when you move
  • Universal: Works with all Australian EVs (Type 2 connector)
  • Backup charging: Emergency option even if you have Level 2 at home
  • Travel charging: Essential for road trips (destination charging)

Level 1 Charger Disadvantages:

  • Very slow: 25-30 hours for full charge (not practical for daily use)
  • Limited daily range: Only recover 80-120km overnight (8 hours)
  • No flexibility: Must plug in immediately after driving to charge by morning
  • Circuit limitations: Cannot run other appliances on same circuit while charging
  • Outlet wear: Continuous 10A draw can overheat old/poor outlets
  • Not suitable for: Full EVs with large batteries (over 60kWh)
  • Upgrading is common: many owners move to Level 2 once daily-use limits bite

Level 1 Total Cost: Charger Purchase Only

One-time charger purchase - check current pricing with retailers. No installation, no ongoing costs. Portable.

Level 2 Charger: Wall-Mounted Fast Home Charging

What is a Level 2 Charger?

Level 2 chargers are wall-mounted units hardwired into your home's electrical system via a dedicated 32-amp circuit. They deliver 7.4kW of power (3-4x faster than Level 1) and require professional installation by a licensed electrician. Most EV owners consider Level 2 essential for practical daily EV ownership.

Technical Specs:

  • Power: 7.4kW (240V at 32A)
  • Connector: Type 2 (IEC 62196)
  • Cable: Tethered 5-7.5m cable
  • Installation: Hardwired, wall-mounted

Charging Performance:

  • Range added: 30-50km per hour
  • Daily driving recovery: 2-3 hours for 100km
  • Full charge (60kWh): 8-10 hours
  • Overnight (8 hours): 240-400km range added

Level 2 Charger Advantages:

  • Fast charging: 3-4x faster than Level 1 (8-10 hours full charge)
  • Flexibility: Can charge in 3-4 hours if needed (not locked into overnight)
  • Practical for full EVs: Works with large batteries (75-100kWh)
  • Smart features: App control, scheduling, solar integration available
  • Future-proof: Handles any EV you buy next (works with all brands)
  • Optimized charging: Schedule for off-peak rates to cut running costs
  • Solar integration: Smart chargers can prioritize solar charging (nearly free)

Level 2 Charger Disadvantages:

  • Higher upfront cost: charger plus professional installation (vs charger-only for Level 1)
  • Installation required: Licensed electrician needed, 3-6 hour install
  • Fixed location: Cannot take with you if you move (unless you remove it)
  • Rental unfriendly: Need landlord/body corporate approval
  • Electrical upgrades: May need a switchboard upgrade - one of the larger quote line items
  • Not portable: Cannot use for travel charging
  • Overkill for PHEVs: Small PHEV batteries (under 20kWh) don't need this speed

Level 2 Total Cost: Charger Plus Installation

Charger unit plus professional installation - ask licensed electricians for itemised quotes covering both. One-time cost.

Charging Speed Comparison: 6km/h vs 30-60km/h Australia

Real-World Charging Time Examples

Small EV: MG ZS EV (51kWh battery, 320km range)

Level 1 Charging:

  • • 0-100%: 21 hours
  • • Overnight (8h): 38% charge (122km range)
  • • Daily use (100km): 7 hours to recover
  • • Verdict: Borderline practical

Level 2 Charging:

  • • 0-100%: 7 hours
  • • Overnight (8h): 100% charge (full 320km)
  • • Daily use (100km): 2 hours to recover
  • • Verdict: Very practical

Medium EV: Tesla Model 3 Long Range (75kWh battery, 550km range)

Level 1 Charging:

  • • 0-100%: 31 hours
  • • Overnight (8h): 26% charge (143km range)
  • • Daily use (100km): 8-10 hours to recover
  • • Verdict: Not practical

Level 2 Charging:

  • • 0-100%: 10 hours
  • • Overnight (8h): 80% charge (440km range)
  • • Daily use (100km): 2.5 hours to recover
  • • Verdict: Perfect fit

Large EV: Tesla Model X (100kWh battery, 580km range)

Level 1 Charging:

  • • 0-100%: 42 hours
  • • Overnight (8h): 19% charge (110km range)
  • • Daily use (100km): 10+ hours to recover
  • • Verdict: Completely impractical

Level 2 Charging:

  • • 0-100%: 13.5 hours
  • • Overnight (8h): 59% charge (342km range)
  • • Daily use (100km): 3 hours to recover
  • • Verdict: Practical (consider 11kW Level 2)

Key Insight: The Overnight Charge Test

The critical question: "Can it fully charge overnight?"

  • Level 1: Only charges 80-143km in 8 hours - not enough for most daily use or full EVs
  • Level 2: Charges 240-440km in 8 hours - enough to wake up with full battery every day
  • Bottom line: Level 2 enables true "wake up fully charged" convenience. Level 1 requires careful charge management and limited daily driving.

Cost Comparison: What Actually Drives the Difference

Where the Costs Actually Differ

Dimension Level 1 Level 2
Upfront Charger purchase only Charger plus professional installation
Installation None - plug in Licensed electrician required; complexity drives the price
Electricity Same energy; long charges can span peak-rate periods Same energy; easy to schedule into off-peak or solar windows
Maintenance Minimal - visual checks Periodic professional inspection recommended
Convenience Slow; needs careful charge management Wake up fully charged

Cost Analysis Insights:

  • Level 1 hidden cost: hours spent waiting on slow charges and planning driving around them
  • Level 2 electricity advantage: short charge windows fit entirely inside off-peak periods, so rate optimisation is easy
  • Level 2 with solar: smart chargers can charge largely from excess daytime generation
  • What moves an install quote: distance from the switchboard, switchboard capacity, and whether an upgrade is needed - compare itemised quotes from licensed electricians

Which Charger Should You Choose? Level 1 vs Level 2 Decision Guide

Choose Level 1 If:

  • You drive a PHEV (plug-in hybrid with under 30kWh battery)
  • Daily driving consistently under 50km
  • You are renting and cannot install hardwired charger
  • Budget limited to a portable charger only
  • Testing EV ownership before committing long-term
  • Need portable charger for travel (take to Airbnbs, friends)
  • Can charge overnight every night without fail (12+ hours)

Choose Level 2 If:

  • You drive a full EV (battery over 50kWh)
  • Daily driving 50-150km regularly
  • You own your home (can install hardwired)
  • Want flexibility for occasional long trips or unexpected driving
  • Planning to keep EV long-term (5+ years)
  • Have or plan to install solar panels (smart charging optimization)
  • Value convenience over upfront cost (time = money)

The Hybrid Approach (A Common Path):

Start with Level 1, upgrade to Level 2 within 6-12 months:

  • • Month 1-3: Use Level 1 to learn EV ownership, test daily charging patterns
  • • Month 3-6: Realize Level 1 is too slow, start researching Level 2 options
  • • Month 6-12: Install Level 2, keep Level 1 as portable backup/travel charger
  • • Result: Best of both worlds - portable backup + fast home charging

This is a common path - a Level 1 charger is often included with the car anyway, so no money is wasted.

Installation Requirements: DIY Plug-In vs Professional Install

Level 1 Installation

What You Need:

  • • Standard 240V 10A power outlet
  • • Within 3-5m of car parking spot
  • • Dedicated circuit (not shared with other appliances)
  • • That's it - plug in and charge!

Installation Process:

  • Step 1: Unbox portable charger
  • Step 2: Plug into existing outlet
  • Step 3: Connect to EV
  • Time: 2 minutes
  • Cost: None

No electrician needed. No permits required. No approvals needed. Renter-friendly.

Level 2 Installation

What You Need:

  • • Licensed electrician (legally required)
  • • Dedicated 32A circuit from switchboard
  • • Wall space for charger mounting
  • • Electrical permit (electrician obtains)
  • • Strata approval if apartment/townhouse

Installation Process:

  • Step 1: Electrician site inspection (often free with a quote)
  • Step 2: Run cable from switchboard to charger location
  • Step 3: Mount wall charger, connect, test
  • Step 4: Compliance certificate issued
  • Time: 3-6 hours
  • Cost: Get itemised quotes

Professional installation required. Takes 1-3 weeks from quote to install. Adds value to property.

Notable Level 1 & Level 2 Chargers in Australia

Product options for each charger type

1 Level 1 Portable Chargers

TESLA ACCESSORY

Tesla Mobile Connector

Check current pricing with retailers

  • 2.4kW charging (10A)
  • 6m cable included
  • Compact, portable design
  • Type 2 (all EVs compatible)

Suits: Tesla owners, premium build quality, travel charging

AUSTRALIAN MADE

EVSE Portable Charger

Check current pricing with retailers

  • 2.4kW charging (10A)
  • 5m cable, Australian made
  • Local support & warranty
  • Weatherproof IP66 rating

Suits: Buyers wanting Australian support, all EV brands

MULTI-ADAPTER

Juice Booster 2

Check current pricing with retailers

  • 2.4kW (10A) to 22kW (32A)
  • Multiple adapter plugs
  • Works worldwide
  • Premium Swiss quality

Suits: Frequent travelers, multiple outlet types, future-proofing

2 Level 2 Wall Chargers

TETHERED TYPE 2

Tesla Wall Connector Gen 3

Check current pricing with retailers

  • 7.4kW (up to 22kW capable)
  • WiFi connectivity
  • Manufacturer warranty (check current terms)
  • Works with all EVs (Type 2)

Suits: All EV owners wanting simple, widely stocked hardware

SOLAR DIVERSION

Zappi EV Charger

Check current pricing with retailers

  • 7.4kW (up to 22kW 3-phase)
  • Solar ECO/ECO+ modes
  • Load balancing built-in
  • Manufacturer warranty (check current terms)

Suits: Solar panel owners wanting solar-priority charging

SMART FEATURES

Wallbox Pulsar Plus

Check current pricing with retailers

  • 7.4kW (up to 22kW 3-phase)
  • Power Boost feature
  • Strong app & smart home support
  • Compact design

Suits: Smart home integration, energy monitoring, compact size

Installation Costs: Level 2 chargers additionally need professional installation - the cost depends mainly on distance from the switchboard, so get itemised quotes from licensed electricians. Level 1 portable chargers need no installation (plug-and-play).

Advanced Features: Smart Charging, Solar & WiFi Capabilities

Smart features, connectivity, and future-proofing

Smart Charging & Scheduling

Level 1 Portable Chargers

No built-in scheduling - Most basic Level 1 chargers are "dumb" devices with no smart features

Vehicle-based scheduling - Rely on your EV's built-in timer to charge during off-peak hours

Limited monitoring - No real-time energy usage tracking (unless using premium models like Juice Booster 2)

Best Practice: Use your EV's built-in scheduling to charge during off-peak times (11pm-7am) for cheaper electricity rates.

Level 2 Smart Chargers

Advanced scheduling - Set charging times via smartphone app to maximize off-peak savings

Real-time monitoring - Track energy usage, charging speed, and costs through mobile app

Dynamic load management - Automatically adjusts charging power based on household electricity usage

RFID access control - Restrict charger access to authorized users (important for shared driveways)

Running Costs: Smart scheduling on a Level 2 charger cuts running costs by charging exclusively during off-peak hours.

Solar Integration & Green Charging

Why Solar Charging Matters in Australia

With Australia's average 6-7 hours of peak sunlight daily, solar EV charging can cut your per-km running cost well below grid charging - and far below petrol.

Daytime Charging Required: Maximum solar benefit requires charging 10am-3pm when panels generate peak power.

Feature Level 1 Portable Level 2 Standard Level 2 Solar-Smart
Solar Excess Detection Not available Limited (manual scheduling) Automatic detection
Dynamic Power Adjustment Fixed 2.4kW only Manual adjustment needed Auto-adjusts 1.4-7.4kW
Grid Import Prevention Always draws from grid Requires manual monitoring 100% solar-only mode
Solar Savings Potential Limited (manual daytime charging) Moderate (scheduled solar) Highest (automatic optimisation)
Example Products Any portable charger + manual scheduling Tesla Wall Connector, Wallbox Pulsar Plus Zappi, Fronius Wattpilot, Evnex E2

Recommendation: If you have solar panels and work from home or can charge during the day, a solar-smart Level 2 charger like Zappi is the class to look at. It costs more than a standard charger, but solar diversion recovers value every sunny day - compare current pricing with suppliers.

App Connectivity & Remote Control

No App Control

Most Level 1 portable chargers, Tesla Mobile Connector, basic EVSE chargers

  • • No remote monitoring
  • • No usage statistics
  • • Rely on vehicle app for control
  • • Lowest cost tier

Basic App Features

Tesla Wall Connector, Wallbox Pulsar Plus, entry-level smart chargers

  • Real-time charging status
  • Energy usage tracking
  • Basic scheduling (start/stop times)
  • Charging history
  • Mid price tier

Advanced Smart Features

Zappi, Fronius Wattpilot, Evnex E2, Juice Booster 2

  • All basic features +
  • Solar excess tracking & optimization
  • Load balancing (whole-home energy management)
  • OCPP compatibility (future-proof)
  • API access for home automation
  • Multi-user access control
  • Premium price tier

Future-Proofing & Emerging Technologies

OCPP (Open Charge Point Protocol) Support

OCPP allows your charger to communicate with third-party networks and VPP (Virtual Power Plant) programs.

OCPP-Compatible Chargers:

  • • Zappi (OCPP 1.6)
  • • Evnex E2 (OCPP 1.6 & 2.0)
  • • Fronius Wattpilot (OCPP 1.6)

Proprietary/Closed Systems:

  • • Tesla Wall Connector (Tesla-only ecosystem)
  • • Most Level 1 portable chargers

Vehicle-to-Grid (V2G) & Bi-Directional Charging

V2G technology allows your EV battery to send power BACK to the grid during peak demand, earning you credits (currently in trial programs across Australia).

⏳ Current Status in Australia:

  • V2G trials active in ACT, SA, NSW (AGL, Origin Energy programs)
  • Nissan Leaf, MG ZS EV, BYD Atto 3 support bi-directional charging
  • Wallbox Quasar 2 is Australia's first V2G-ready home charger
  • Zappi will support V2G via firmware update (future-proof investment)

If planning to keep your charger 10+ years, choose OCPP-compatible models with V2G upgrade potential.

Dynamic Load Balancing (Critical for Modern Homes)

Load balancing prevents your home's main breaker from tripping by automatically reducing charger power when other appliances are running.

Without Load Balancing:

Running EV charger (32A) + ducted heating (25A) + oven (20A) = 77A total draw → Main breaker trips (most homes 63-80A limit)

With Load Balancing:

Smart charger detects appliance load, reduces to 18A automatically → No circuit trips, charging continues safely

Chargers with Load Balancing: Zappi, Fronius Wattpilot, Wallbox Pulsar Plus, Evnex E2

Chargers WITHOUT: Tesla Wall Connector, all Level 1 portable chargers

Long-Term Ownership & Maintenance

Expected lifespan, maintenance needs, and upgrade paths

Maintenance Requirements & Durability

Level 1 Portable Chargers

Annual Maintenance Needs:

  • Visual inspection of cable for fraying/damage (every 3-6 months)
  • Plug/socket inspection - check for burn marks or loose connections
  • Keep dry - store indoors when not in use (cables degrade in UV/weather)

Expected Lifespan:

Cable wear limits lifespan

Cable wear from coiling/uncoiling is the main failure point; premium models tend to last longer with care. Check the manufacturer's stated design life and warranty terms.

Replacement Parts:

  • • Cable replacement (priced by brand)
  • • Plug adapters (priced by brand)
  • • Eventual full unit replacement

Long-Term Maintenance: minimal - occasional part replacement is the only recurring cost

Level 2 Wall Chargers

Annual Maintenance Needs:

  • Professional inspection every 2-3 years (ask your electrician for pricing) - check RCD, connections
  • Cable inspection - look for rodent damage, UV degradation
  • Software updates - install via app (free, 1-2 times per year)
  • Weather protection - ensure outdoor installations have proper IP rating

Expected Lifespan:

Built for long service life

Hardwired installation reduces wear, and the electronics typically outlast the cable. Check each manufacturer's stated design life and current warranty terms.

Replacement Parts:

  • • Tethered cable replacement
  • • Type 2 socket replacement
  • • Internal contactor/relay
  • • Eventual full unit replacement

Long-Term Maintenance: modest (periodic inspections plus minor repairs - priced by your electrician)

Critical Safety Check: RCD (Residual Current Device) Testing

Both charger types in Australia require RCD protection. Test your RCD monthly by pressing the "TEST" button on your switchboard. If it doesn't trip immediately, call a licensed electrician—this is a serious safety hazard.

Non-compliance: Penalties apply for non-compliant electrical work, varying by state. Insurance may be void in case of fire.

Warranty Coverage & Manufacturer Support

Check Current Warranty Terms

Warranty length and what it covers differ between brands and change over time. Before buying, check the manufacturer's current published warranty terms for Australia - including whether cables, electronics and labour are covered, and whether installation by a certified installer is required to keep the warranty valid.

Australian Consumer Law guarantees apply in addition to any manufacturer warranty - see the ACCC for details.

Support Considerations

  • • Where is warranty support handled - locally or via an overseas distributor?
  • • Typical replacement turnaround - ask the retailer or installer before purchase
  • • Whether your installer offers their own workmanship warranty on the electrical work
  • • Verify your electrician's licence via lookforthetick.com.au

Upgrade Paths & Resale Value

Starting with Level 1 → Upgrading to Level 2

When to Upgrade:

  • ✓ Daily driving increases from 80km → 150km+
  • ✓ You install solar panels (solar integration worth it)
  • ✓ You buy a second EV (multi-car household)
  • ✓ Moving to a permanent home after renting

What Happens to Your Level 1 Charger:

  • Option 1: Keep as a backup/travel charger (nothing wasted)
  • Option 2: Sell second-hand on Facebook Marketplace/Gumtree
  • Option 3: Donate to family/friends transitioning to EV

Depreciation: Portable chargers lose value second-hand like any accessory - condition and included adapters drive the resale price.

Level 2 Charger: Home Value Considerations

What actually drives any resale contribution:

  • • The suburb's price ceiling and how common EV ownership is among likely buyers
  • • The condition of the rest of the home - a charger doesn't offset bigger issues
  • • Whether the install is documented (compliance certificate) and transferable
  • • Your selling agent's read on what local buyers value - ask before assuming a premium

Treat any resale upside as a bonus, not a reason to install. The case for Level 2 rests on day-to-day charging convenience.

Obsolescence Planning & Future-Proofing

Will Type 2 Connectors Become Obsolete?

Type 2 is the National Standard - No Replacement on the Horizon

  • IEC 62196 Type 2 is the locked-in Australian standard (AS/NZS 3000)
  • • ALL EVs sold in AU since 2020 use Type 2 (legally required)
  • • Even Tesla switched from proprietary to Type 2 in 2023 (Australia)
  • • EU, UK, AU all standardised on Type 2 (global consistency)

Future Developments (No Impact on Home Charging):

  • Megawatt Charging System (MCS): For trucks only, not residential
  • Wireless charging: Not close to mainstream, expensive
  • Tesla North America Connector: Not coming to Australia (Type 2 locked in)

Bottom Line: A Type 2 charger bought today should remain compatible for the foreseeable future - Type 2 is the entrenched national standard, with no replacement on the horizon.

Software Updates & Cloud Service Dependency

Risk: Cloud-Connected Smart Chargers

Some smart chargers require cloud connectivity for advanced features (solar optimization, remote monitoring). What happens if the company shuts down their servers?

Cloud-Dependent (High Risk):

  • • Evnex E2 (relies on Evnex cloud)
  • • Wallbox Pulsar Plus (some features cloud-only)
  • Risk: If company fails, app stops working

Offline-Capable (Low Risk):

  • • Tesla Wall Connector (works without WiFi)
  • • Zappi (local network mode available)
  • • All Level 1 portable chargers (no cloud)

Recommendation: For Level 2 chargers, choose models with offline fallback mode or OCPP compatibility (allows switching to different cloud providers).

10-Year Technology Outlook

Timeline Expected Changes Impact on Your Charger
2026-2027 V2G trials expand, OCPP 2.0 adoption grows OCPP-compatible chargers get firmware updates. Non-OCPP locked out of VPP programs
2027-2030 Bi-directional charging mainstream, mandatory smart charging in new builds Older "dumb" chargers still work but miss out on VPP program income
2030-2035 Wireless charging available (expensive), Type 2 still dominant No impact - Type 2 chargers remain fully functional and supported

Australian Market Considerations

AS/NZS standards, state rebates, and Australia-specific requirements

AS/NZS 3000 Electrical Standards (Compliance Requirements)

Legal Requirement: Licensed Electrician for Level 2 Installation

Under AS/NZS 3000:2018 (Australian Wiring Rules), all EV charger installations requiring hardwiring or dedicated circuits MUST be performed by a licensed electrician. DIY installation is ILLEGAL and voids insurance. Verify an electrician's licence via lookforthetick.com.au.

Penalties for Non-Compliance:

  • Fines: Penalties apply for non-compliant electrical work, varying by state
  • Insurance void: Home & contents insurance claims rejected in case of electrical fire
  • Property sale issues: Certificate of Electrical Safety required (illegal work must be rectified)
  • Personal injury liability: If someone is electrocuted, criminal charges possible

Level 1 Portable Chargers (Plug & Play)

What's Legal (No Electrician Required):

  • • Plugging into existing 10A or 15A power point
  • • Using portable chargers rated ≤2.4kW
  • • Charging via standard household outlets

When You DO Need an Electrician:

  • • Installing a NEW outdoor power point (weatherproof)
  • • Upgrading old 2-pin outlets to 3-pin + earth
  • • Adding RCD protection if not present
  • • Verifying outlet can handle continuous 10A load

Cost: ask a licensed electrician to quote the inspection, RCD and outlet upgrade

Level 2 Wall Chargers (Always Requires Electrician)

Mandatory Compliance Requirements:

  • 1️⃣ Dedicated 32A circuit breaker (Type B or Type C preferred for EV loads)
  • 2️⃣ Type A RCD (30mA) - detects DC fault currents (critical for EV safety)
  • 3️⃣ 6mm² cable minimum for 32A loads (may need 10mm² for long runs >20m)
  • 4️⃣ IP65 rating if installed outdoors (dust/water ingress protection)
  • 5️⃣ Certificate of Electrical Safety issued upon completion (keep for property records)

Why Installation Costs Vary: Distance from switchboard, existing circuit capacity, and switchboard upgrade needs move the price - make sure quotes itemise them.

State-by-State EV Charger Rebates & Incentives (2026)

Important: Rebates typically apply ONLY to Level 2 wall charger installations. Level 1 portable chargers are excluded. Always check current eligibility before purchasing.

State/Territory Rebate Amount (2026) Eligibility Application Process
NSW Check your state's current program Programs change - confirm current status on the official NSW Government website Also check your local council for incentives
VIC Check current programs Victoria's earlier EV subsidy has closed - check Solar Victoria for what is currently offered Solar Victoria is the official program administrator
QLD Rebate scheme closed The Zero Emission Vehicle Rebate Scheme closed in September 2024 - see QRIDA for the official record Check Queensland Government sites for any newer programs
SA Subsidy closed South Australia's EV subsidy closed in December 2024 - see SA Treasury for current incentives Treasury lists what remains available (e.g. loans, duty settings)
WA Check your state's current program Confirm eligibility on the official WA Government website Via the WA Government's EV incentive pages
TAS Check your state's current program Confirm current status via Service Tasmania Via Service Tasmania
ACT Check your territory's current program EV concessions have applied (e.g. stamp duty) - confirm current settings on the official ACT Government website Via the official ACT Government website
NT Check your territory's current program Confirm on the official NT Government website N/A

Pro Tip: Rebate programs change frequently. Always check official state government websites before purchasing. Some rebates require pre-approval BEFORE installation begins.

Links: Solar Victoria | QRIDA (Qld) | SA Treasury

Three-Phase Power in Australia (11kW-22kW Charging)

What is Three-Phase Power?

Most Australian homes have single-phase 230V power (max 7.4kW EV charging). Some properties have three-phase 400V power, enabling 11kW or 22kW fast charging at home.

Properties Likely to Have Three-Phase:

  • ✓ Rural/farm properties (irrigation pumps, workshops)
  • ✓ Homes with ducted air conditioning (central system)
  • ✓ Properties with solar systems >10kW
  • ✓ Industrial-zoned properties converted to residential
  • ✓ New luxury developments (often installed as standard)

How to Check if You Have Three-Phase:

  • Method 1: Open switchboard - look for 3 main fuses/breakers (not just 1)
  • Method 2: Check your electricity bill - sometimes states "3-phase supply"
  • Method 3: Ask a licensed electrician during a quote (free to check)
  • Method 4: Contact your electricity distributor (Ausgrid, Powercor, etc.)

Single-Phase (7.4kW)

Most Australian homes

  • Max charging: 7.4kW (32A)
  • Tesla Model 3 charge time: 9-10 hours (0-100%)
  • Cost: check current charger pricing
  • Sufficient for: the vast majority of daily driving needs

Three-Phase (11kW)

A minority of Australian homes

  • Max charging: 11kW (16A per phase)
  • Tesla Model 3 charge time: 6-7 hours (0-100%)
  • Cost: check current charger pricing
  • Worth it if: Daily driving >200km or fleet vehicles

Three-Phase (22kW)

Rare in Australian homes

  • Max charging: 22kW (32A per phase)
  • Tesla Model 3 charge time: 4-5 hours (0-100%)
  • Cost: check current charger pricing
  • Overkill unless: Commercial fleet or ultra-high mileage (>300km/day)

Should You Upgrade to Three-Phase Just for EV Charging?

Cost to upgrade: significant - new cable from the street transformer, switchboard upgrade and network fees; get it quoted separately

Answer: Only if you ALSO benefit from three-phase for other uses (solar >10kW, workshop equipment, central AC). For EV charging alone, single-phase 7.4kW is sufficient for most users.

Exception: Rideshare/taxi drivers doing 300km+ daily may justify the upgrade through faster turnaround.

Finding Quality EV Charger Installers in Australia

Manufacturer Certified Installer Networks

Brands with Strong AU Installer Networks:

  • Zappi (myenergi): certified installer network nationwide - warranty handled via the installer (check current terms)
  • Tesla: Official installer network in all capital cities, mobile service available
  • Fronius: Leverages its existing Australian solar installer network
  • EVSE Australia: Direct-to-consumer sales with installer recommendations

Brands with Limited AU Support:

  • European imports (Wallbox, Easee): Fewer certified installers outside metro areas
  • Chinese brands (unbranded): No official installer network, warranty claims difficult
  • Juice Booster 2: Portable only (no installation), but limited local warranty support

Installer Verification Checklist (Protect Yourself)

Before Hiring, Verify:

  • Electrical licence number (verify via lookforthetick.com.au or your state's licensing register)
  • Public liability insurance (ask for a certificate of currency)
  • EV charger installation experience (ask for 3 recent references)
  • Warranty terms - parts vs labour coverage
  • Estimated timeline (1-day install typical, 2-3 days if switchboard upgrade needed)

Red Flags (Avoid These Installers):

  • Cannot provide license number or insurance
  • Quotes far below every other quote you receive - usually a corner is being cut
  • Pressures you to decide same-day
  • Refuses to provide written quote or timeline
  • No references or online reviews
  • Suggests "bypassing" council permits or electrical inspections

Pricing Reality: A standard install (short run from the switchboard, no upgrades) sits at the low end; switchboard upgrades, 20m+ cable runs and three-phase work move quotes up sharply. Get 3 itemised quotes to compare.

Regional vs Metro Installer Availability

Installer availability is strongest in the capital-city metro areas and thinner in regional and rural Australia. Outside the capitals, expect longer waits between quoting and installation, and possible travel fees for remote properties - ask for these as a quote line item.

Rural/Regional Tip: If you're >100km from a capital city, consider a Level 1 portable charger initially (DIY setup). Wait for installer availability to improve, or combine EV charger install with other electrical work (solar, switchboard upgrade) to split travel fees.

Safety & Technical Requirements: AS/NZS 3000 Compliance

Critical safety protocols and compliance for home EV charging

Outlet Load Capacity & Continuous Load Limits

CRITICAL: Why "Continuous Load" Rating Matters

Australian electrical code (AS/NZS 3000) requires that any load operating for 3+ hours continuously must NOT exceed 80% of the circuit breaker rating. Since EV charging runs 6-12 hours overnight, this is a continuous load.

Dangerous Scenario Example:

WRONG: Plugging a 2.4kW (10A) EV charger into a standard 10A outlet on a 16A circuit breaker.

Problem: 10A continuous load = 62.5% of 16A breaker (safe). BUT if other devices share that circuit (lights, fridge), combined load can exceed 16A, causing overheating and potential fire risk.

CORRECT: Ensure your EV charger is on a dedicated circuit with nothing else drawing power, OR limit charger to 8A (1.8kW) to allow safety margin.

Level 1 (10A Outlet) Safety Checklist

Before Plugging In Your EV Charger:

  • 1️⃣ Check outlet age: Outlets >15 years old may have deteriorated connections (burn risk). Replace if discolored.
  • 2️⃣ Test outlet voltage: Use multimeter - should read 230-240V. If <220V, contact electrician.
  • 3️⃣ Verify dedicated circuit: Turn off circuit breaker, ensure ONLY garage/carport outlets go dark (not living areas).
  • 4️⃣ Check for heat after 1st charge: After first overnight charge, touch plug + outlet. Should be cool. Warm = call electrician immediately.

Fire Hazard Warning: If your outlet feels warm (>40°C) during charging, STOP immediately and get an electrician to inspect. This indicates loose connections or undersized wiring—a major fire risk.

Level 2 (32A Circuit) Protection Requirements

Mandatory Circuit Protection Components:

  • Type A RCD (30mA): Detects DC leakage currents from EV (standard RCDs may not trip on DC faults)
  • Type C circuit breaker (32A): Handles inrush current when charger starts (Type B also acceptable)
  • Surge protection: Recommended for smart chargers (protects electronics from lightning/grid surges)
  • Cable sizing: 6mm² minimum for 32A, 10mm² for runs >20m (prevents voltage drop)

Note: These protection components are included in most install quotes - check your quote itemises the RCD, circuit breaker and any surge protection.

Weather Protection & Outdoor Installation Standards

IP Ratings Explained (Ingress Protection)

The IP rating (e.g., IP65) indicates protection against dust and water. For Australian outdoor conditions (rain, dust), you need specific minimum ratings.

IP20-IP44 (Indoor Only)

Basic protection against large objects and light splashes

Unsafe for: Outdoor, uncovered carports, coastal areas

IP54-IP55 (Covered Outdoor)

Protection against dust and water spray from all directions

Safe for: Covered carports, garages with open sides

IP65-IP67 (Fully Outdoor)

Dust-tight and protected against powerful water jets

Safe for: Fully exposed outdoors, coastal, tropical climates

Level 1 Portable Chargers

Typical IP Rating:

Most Level 1 portable chargers: IP54-IP66 (varies by brand)

  • • Tesla Mobile Connector: IP67 (fully outdoor safe)
  • • EVSE Australia portable: IP54 (covered areas only)
  • • Juice Booster 2: IP67 (fully outdoor safe)

Best Practices for Outdoor Use:

  • • Never leave charger sitting in puddles (IP rating protects from spray, not submersion)
  • • Store control box off ground (hang on wall hook when not in use)
  • • Coil cable loosely—tight coiling traps moisture in connectors
  • • Bring indoors during storms if possible (lightning risk)

Level 2 Wall Chargers

Recommended IP Ratings by Location:

  • Indoor garage (fully enclosed): IP44 minimum
  • Covered carport: IP54 minimum
  • Fully outdoor (driveway): IP65 minimum
  • Coastal areas (salt spray): IP67 + marine-grade coating

Top Outdoor Chargers: Tesla Wall Connector (IP54), Zappi (IP65), Fronius Wattpilot (IP54), Wallbox Pulsar Plus (IP54)

Coastal Australia Tip: If within 5km of ocean (Sydney Northern Beaches, Gold Coast, etc.), choose IP65+ AND ask the installer to apply anti-corrosion coating to cable terminals (prevents salt damage).

Fire Safety Protocols & Emergency Procedures

What To Do If Your Charger or Outlet Catches Fire

Emergency Steps (In Order):

  1. DO NOT touch the charger or EV - electrocution risk
  2. Immediately turn off main switchboard power (if safe to access)
  3. Call 000 (Fire Brigade) - say "electrical fire involving electric vehicle"
  4. Evacuate building - EV battery fires release toxic gases
  5. DO NOT use water - electrical fire requires CO2 or foam extinguisher
  6. Wait for emergency services - firefighters trained in EV battery fires

Prevention: Install a photoelectric smoke alarm NEAR your charger location (not just in hallways). EV charger fires often start small and can be caught early.

Warning Signs of Electrical Issues

If you notice ANY of these, stop charging immediately and call a licensed electrician:

CRITICAL (Stop Using Now):

  • • Outlet or plug feels HOT (>50°C, uncomfortable to touch)
  • • Burning smell or discolored plastic around outlet
  • • Sparking or arcing when plugging in
  • • Circuit breaker trips repeatedly during charging
  • • Tingling sensation when touching car body during charging

CONCERNING (Get Checked Soon):

  • • Outlet feels warm (35-45°C) after 8+ hours charging
  • • Flickering lights in house when charger starts
  • • Charger frequently reduces power automatically
  • • RCD trips occasionally (once per month or more)

Insurance & Liability Considerations

Home & Contents Insurance:

  • Notify your insurer when installing Level 2 charger (some policies require disclosure)
  • Keep electrical safety certificate - needed for claims if fire occurs
  • DIY installation VOIDS insurance - claims will be rejected

Public Liability (Shared Driveways/Strata):

  • • If your charger causes fire that damages neighbor's property, you may be liable
  • • Strata insurance may NOT cover EV charger incidents (check policy)
  • • Consider increasing public liability cover if sharing a driveway

Disclosure: Adding EV charger disclosure to home insurance usually has little or no premium impact. Not disclosing risks claim rejection.

Earthing Systems & Periodic Testing Requirements

Why Proper Earthing is Critical for EV Charging

EVs have large battery packs operating at 400V DC. If there's a fault, electricity seeks the path of least resistance to ground. Without proper earthing, that path could be through YOU when you touch the car.

Proper Earthing Setup:

  • • Earth stake driven 2.4m+ into soil
  • • Earth resistance <5 ohms (tested with earth tester)
  • • Continuous earth wire from switchboard → charger → car
  • • All metal parts bonded (charger case, mounting bracket)

Result: Fault current instantly trips RCD (30 milliseconds), preventing electrocution

Poor Earthing Risks:

  • • Earth stake too shallow or dry soil (high resistance)
  • • Loose earth wire connections
  • • Earth wire corroded (coastal areas)
  • • No earth wire at all (old properties, illegal for EV charging)

Result: RCD may not trip fast enough, risk of fatal shock

Recommended Testing Schedule

Test Type Frequency Cost Why Important
RCD Test (Button) Monthly (DIY) Free (DIY) Press "TEST" button on switchboard - should trip instantly. If not, call electrician immediately.
Visual Inspection Every 6 months (DIY) Free (DIY) Check cables for damage, outlet for discoloration, charger for cracks/corrosion.
Professional RCD Test Every 2 years Ask your electrician Tests RCD trip time (must be <30ms) and sensitivity. DIY button test doesn't verify speed.
Earth Resistance Test Every 3-5 years Ask your electrician Measures earth stake resistance. Coastal areas: every 2 years (salt corrosion).
Thermal Imaging Every 5 years (optional) Ask your electrician Detects hot spots in wiring/connections invisible to eye (prevents fires).

Money-Saving Tip: Combine periodic testing with other electrical work (e.g., when electrician installs solar panels or upgrades switchboard) to save on callout fees. Bundled testing is typically cheaper.

FAQ

Frequently Asked Questions

Clear answers to the questions homeowners usually ask before comparing quotes.

1

What is the main difference between Level 1 and Level 2 EV chargers?

The main difference is **charging speed and power**: **Level 1** uses standard 240V 10A household outlet, charges at 2.4kW, adds 10-15km range per hour, takes 24-36 hours for full charge. **Level 2** uses dedicated 32A circuit, charges at 7.4kW (3x faster), adds 30-50km range per hour, full charge in 6-10 hours. Level 1 requires no installation (charger purchase only), Level 2 requires professional hardwired installation - get itemised quotes for the charger and the electrical work. Level 1 works for PHEVs and low daily driving (under 50km). Level 2 is essential for full EVs and daily driving over 80km. Most EV owners start with Level 1 but upgrade to Level 2 within 6-12 months for convenience.
2

Can I use a Level 1 charger for my Tesla Model 3 or other full EV?

Yes, you **can** use Level 1, but it is **not practical** for daily use with full EVs: **Level 1 limitations for Tesla Model 3 (75kWh battery):** Takes 31 hours for 0-100% charge, adds only 10-12km range per hour, cannot recover full daily driving (100km) overnight, works only if driving under 50km per day consistently. **When Level 1 works:** PHEVs with small batteries (10-20kWh), Emergency backup charging, Very low daily driving (under 40km), Overnight charging with minimal use, Rental properties (portable solution). **When you need Level 2:** Daily driving over 80km, Full EVs (60kWh+ batteries), Need flexibility for occasional long trips, Want to charge in 6-10 hours not 30+ hours. **Reality check:** Many Tesla owners who start on Level 1 end up installing Level 2 because Level 1 is too slow for real-world full-EV ownership.
3

How much faster is Level 2 charging compared to Level 1?

**Level 2 is 3-4x faster** than Level 1 for home charging: **Charging speed comparison:** Level 1 (2.4kW): 10-15km range per hour, Level 2 (7.4kW): 30-50km range per hour, **3-4x faster**. **Full charge time examples (60kWh EV battery):** Level 1: 25-30 hours (0-100%), Level 2: 8-10 hours (0-100%), **3x faster**. **Daily driving recovery (100km used):** Level 1: 7-10 hours to recover 100km range, Level 2: 2-3 hours to recover 100km range, **3x faster**. **Real-world impact:** Level 1 = Must plug in immediately after getting home to have full charge next morning, Level 2 = Plug in anytime evening, wake up fully charged. **Premium Level 2 (11kW, 3-phase):** 45-60km per hour = **5x faster** than Level 1, full charge in 5-6 hours. Level 2 provides flexibility - can charge in 3-4 hours if needed, not locked into 24+ hour charging cycles.
4

Is Level 2 charging worth the extra cost over Level 1?

**Yes, for most full-EV owners** - Level 2 provides significant everyday value despite the higher upfront cost of the charger plus professional installation. **When Level 2 is worth it:** Daily driving over 80km, full EV ownership (not PHEV) - it makes daily charging practical, planning to keep the EV long-term (the installation cost is spread over years of use), home ownership (you can install hardwired), and wanting flexibility for occasional long trips or unexpected driving. The convenience difference is large: Level 2 turns charging into an overnight non-event instead of a rolling 24-hour-plus constraint. **When Level 1 is sufficient:** PHEV with a small battery (under 20kWh), daily driving consistently under 50km, renting (cannot install a hardwired charger), a strictly limited budget, and being able to charge overnight every night without fail. Compare itemised quotes from licensed electricians before deciding - installation complexity is what moves the total.
5

Can I upgrade from Level 1 to Level 2 later?

**Yes, easily** - most EV owners start with Level 1 and upgrade to Level 2 within 6-12 months: **Upgrade process:** Keep Level 1 portable charger as backup/travel charger (always useful), Hire licensed electrician to install Level 2 wall charger, Installation takes 3-6 hours typically, No additional electrical work needed beyond standard Level 2 install. **Costs for upgrade:** Same as a new Level 2 install - get itemised quotes; the Level 1 charger stays as a backup (not wasted money), or can be sold second-hand if you don't want it. **Common upgrade timeline:** Month 1-3: Level 1 works fine, learning EV basics, Month 3-6: Frustration with slow charging grows, occasional range anxiety, Month 6-12: Install Level 2 for convenience and flexibility. **Smart strategy:** Start with Level 1 to test EV ownership, confirm charging patterns, Upgrade to Level 2 once committed to EV lifestyle. **What you'll keep:** Level 1 portable charger useful for: Emergency backup at home, Travel charging (friends/family/holiday houses), Airbnb/hotel charging, Workplace charging if no charger available. Starting with Level 1 and upgrading to Level 2 once the limitations bite is a very common path.
6

Which Australian EVs work with Level 1 vs Level 2 chargers?

**All Australian EVs work with both** Level 1 and Level 2 - difference is charging speed, not compatibility: **Level 1 suitable EVs (can tolerate slow charging):** **PHEVs:** Mitsubishi Outlander PHEV (20kWh) - 8 hours Level 1, MG HS PHEV (16.6kWh) - 7 hours Level 1. **Small EVs:** MG ZS EV (51kWh) - 21 hours Level 1 (borderline practical), Nissan Leaf (40kWh) - 17 hours Level 1 (works if low daily use). **Level 2 recommended EVs (need faster charging):** **Medium EVs:** Tesla Model 3/Y (60-75kWh) - 8-10 hours Level 2, Hyundai Ioniq 5 (72kWh) - 10 hours Level 2, Kia EV6 (77kWh) - 10 hours Level 2, Polestar 2 (78kWh) - 11 hours Level 2. **Large EVs:** Tesla Model X/S (95-100kWh) - 13-14 hours Level 2, BMW iX (111kWh) - 15 hours Level 2, Mercedes EQS (108kWh) - 15 hours Level 2. **Charging port compatibility:** All Australian EVs use Type 2 connector (IEC 62196), works with both Level 1 portable and Level 2 wall chargers, No adapter needed - same plug for both levels. **Real rule:** Battery under 30kWh + daily driving under 50km = Level 1 okay, Battery over 50kWh or daily driving over 80km = Level 2 essential.
7

Do I need an electrician for Level 1 or Level 2 installation?

**Level 1: No electrician needed** (plug-and-play). **Level 2: Licensed electrician required by law**. **Level 1 installation (DIY-friendly):** Plug portable charger into standard 240V 10A outlet, No electrical work required, No permits needed, No installation cost (just the charger purchase). **Important:** Ensure outlet is on dedicated circuit (not shared with other high-draw appliances), Outlet should be within 3-5m of car parking spot, Test outlet can handle 10A continuous draw (run appliance for 2 hours). **Level 2 installation (professional only):** **Legally required:** Licensed electrician with electrical work license, Electrical work permit (electrician obtains), Compliance certificate (AS/NZS 3000 standards), Cannot DIY - penalties apply for non-compliant electrical work, varying by state, and insurance can be voided. **What electrician does:** Install dedicated 32A circuit from switchboard, Run cable to charger location (surface or underground), Mount wall charger and connect, Test RCD safety switch, Issue compliance certificate. **Installation cost:** varies mainly with distance from the switchboard - get itemised quotes. **DIY risks for Level 2:** Illegal (penalties apply, varying by state), fire hazard from incorrect wiring, electrocution risk (240V 32A is dangerous), insurance won't cover damage, and property sale complications without a compliance certificate. **Bottom line:** Level 1 = DIY friendly, plug it in. Level 2 = Always use licensed electrician, no exceptions.
8

What are the ongoing running costs for Level 1 vs Level 2 chargers?

**Running costs are essentially the same** - the difference is charging speed, not electricity consumption. Both levels use the same kWh to charge the battery; Level 2 just delivers it faster, like a tap filling a bucket fast vs slow - same water used. **Where costs differ:** a Level 1 charge can span 24+ hours, so it often runs across peak-rate periods and is harder to optimise for the cheapest rates. Level 2 can complete a top-up within an off-peak window alone, and smart Level 2 chargers schedule this automatically; solar owners can go further by charging from excess daytime generation. **Maintenance:** Level 1 needs none beyond visual checks; Level 2 benefits from periodic professional inspection (ask your electrician for pricing). **Bottom line:** same energy either way, but Level 2 makes it much easier to buy that energy at the cheapest times.
Free quote match

Get Free EV Charger Quotes from Licensed Level 2 Electricians

Compare installation quotes for Tesla Wall Connector, Zappi, and all major brands. No obligation, 100% free.

Verified ev charger installation specialists

Matched by project type, service area and availability.

Compare scope, inclusions and timing

Understand what each quote includes before choosing.

Free, fast and no obligation

We pass your request to matched local suppliers - response times vary.

EV Charger Installation quote match

Get your free quotes

Secure

About your EV Charger Project

SSL Secure
No obligation
Privacy Protected

Ready to install your EV charger?